Monitoring server storage should be part of every data center monitoring procedure. Learn how to monitor and analyze server storage use and growth with Diskover.
Many of us monitor disk utilization in the data center and in our homelabs. It's important for future planning and avoiding storage disasters, but how many of us are going beyond this simple monitoring and taking a deeper look by analyzing what is driving the data growth on our servers? Or how many times have you thought to yourself, "Where is my space going?!".
Thankfully, there is a utility that allows us to not only monitor our server storage growth, but also take a deeper look and analyze how that disk usage is being spent. This storage monitoring utility is called Diskover and, true to its name, it allows you to discover what is occupying your disk space. In today's guide I will walk you through how to install Diskover with Docker followed by a brief introduction on how to analyze Linux disk usage and growth using it. Let's begin!
A Brief Introduction to Docker and How to Install It
What Is Docker? A Brief Introduction
To begin, we'll first need to install Docker. While today's guide is not meant to be a Docker tutorial, which I'll be saving for a future series, you should still know what Docker is and why we're using it here. So what is Docker?
You're probably familiar with the idea of virtual machines (VMs) where you have a hypervisor installed on a server which allows multiple, independently-installed virtual machines to run on it. The hypervisor manages the resources of the VMs and passes their instructions through to the bare metal server it's sitting on. In such a set up, each VM acts as its own machine. Each VM is fully independent with its own OS installed and, at least from the VM's point of view, with its own "hardware". The VM likely doesn't even know that it is a virtual machine; it thinks it's a real computer like the one installed on your usual desktop PC or laptop.
Similarly, Docker resembles a VM in that it allows you rapidly spin up different, independent services/applications. These Docker instances are known as containers and are analogous to a VM, but they have distinct advantages. As you can imagine, in the traditional virtualization paradigm where you have many virtual machines running, the storage requirements can really begin to add up. It seems even more wasteful when you consider that there's an excellent chance that most of those VMs are running the same OS (such as Ubuntu) and therefore, much of your storage space is being wasted on redundant data storing the same copies of the same OS installs. Docker optimizes its way around this waste by running on top of the OS layer, therefore removing the need to replicate the same OS across multiple VMs. Docker containers also reduce the overhead inherent in running multiple services across multiple VMs, as you don't need to run multiple machines each with their own inherent system processes.
At this point, I also want to point out that containerization (Docker) and your traditional virtualization paradigms (such as VMs on Proxmox or ESXi), need not compete with each other. Each has its place and the two can be combined to compliment each other quite nicely. Today's guide is one such example. In today's guide, we'll be installing Docker within a VM in order to use a diskover container to monitor that same VM. Let's dig in!
How to Install Docker
There are many guides out there on how to install Docker, so I will only summarize them here. The following is taken from the official Docker Docs and should get you started:
sudo apt-get update

sudo apt-get install \
    apt-transport-https \
    ca-certificates \
    curl \
    gnupg-agent \
    software-properties-common

curl -fsSL https://download.docker.com/linux/ubuntu/gpg | sudo apt-key add -

sudo add-apt-repository \
   "deb [arch=amd64] https://download.docker.com/linux/ubuntu \
   $(lsb_release -cs) \
   stable"

sudo apt-get update

sudo apt-get install docker-ce docker-ce-cli containerd.io
Once this is complete, Docker should now be installed on your system. You can confirm with:
sudo docker run hello-worldInstall Docker Compose
Now, another way that Docker containers differ from virtualization, is in their inherent philosophy. On your traditional VM set up, each virtual machine is often set up as its own server with all of the required services/applications also set up on this same server. In stark contrast to such monolithic servers, where everything is contained on one machine, an individual Docker container typically does only one thing. For example, it may run a Ghost blog, or it may run an NGINX reverse proxy, or a SQL server (which may be needed to run a Ghost blog), but rarely does it ever try to run all of these things within the same container. Instead, each of these containers run separately. Docker is big on the whole "do one thing and do it well" philosophy. It's also what makes Docker so powerful, since each Docker image becomes like a Lego, which can be stitched together to do something useful.
So how do we combine these Docker container Legos to make something useful? Enter Docker Compose. Docker Compose allows us to deploy multiple Docker containers at once, as a unit, and combine them in such a way that they are actually useful. Unfortunately, Docker Compose is packaged separately from the Docker Engine, and so we'll need to install it separately:
sudo curl -L "https://github.com/docker/compose/releases/download/1.25.0/docker-compose-$(uname -s)-$(uname -m)" -o /usr/local/bin/docker-compose

sudo chmod +x /usr/local/bin/docker-compose
Simple enough, eh? All we've done here is downloaded docker compose with curl to /usr/local/bin/docker-compose and then made it executable with chmod.
How to Install and Deploy Diskover
Now that we have the prerequisite Docker Engine and Compose installed, we're ready to move on to the real meat of this article; this article's raison d'etre: deploying a Diskover docker container so that we can monitor the server's disk usage.
For the rest of this guide, I'll assume that you're already SSH'd into whatever device you wish to monitor storage use on, whether that's a server or a Linux desktop, a VM or baremetal host, it doesn't matter. Diskover will run on it all. (That's another great thing about Docker, it's largely platform independent).
The screenshots you see below were taken from Visual Studio Code ("VS Code"). VS Code can be helpful for setting stuff like this up where you may need to interact with files remotely. While I highly recommend it, VS Code is far from mandatory and a regular PuTTY/Ubuntu terminal SSH connection is perfectly fine. However, if you are interested, see this guide for setting up a remote SSH connection with VS Code.
1. Create a directory to hold Diskover (and its related files):
mkdir ./diskover2. Create a docker-compose file with either nano (if you're just SSH'd in) or directly with VS Code:
cd ./diskover

nano docker-compose.yml
3. Copy and paste the following into your new docker-compose.yml file:
version: '2'
services:
  diskover:
    image: linuxserver/diskover
    container_name: diskover
    environment:
      - PUID=1000
      - PGID=1000
      - TZ=America/Chicago
      - REDIS_HOST=redis
      - REDIS_PORT=6379
      - ES_HOST=elasticsearch
      - ES_PORT=9200
      - ES_USER=elastic
      - ES_PASS=changeme
      - RUN_ON_START=true
      - USE_CRON=true
    volumes:
      - ${HOME}/diskover/config:/config
      - /:/data
    ports:
      - 3000:80
      - 9181:9181
      - 9999:9999
    mem_limit: 4096m
    restart: unless-stopped
    depends_on:
      - elasticsearch
      - redis
  elasticsearch:
    container_name: elasticsearch
    image: docker.elastic.co/elasticsearch/elasticsearch:5.6.9
    volumes:
      - ${HOME}/diskover/elasticsearch/data:/usr/share/elasticsearch/data
    environment:
      - bootstrap.memory_lock=true
      - "ES_JAVA_OPTS=-Xms1024m -Xmx1024m"
    ulimits:
      memlock:
        soft: -1
        hard: -1
  redis:
    container_name: redis
    image: redis:alpine
    volumes:
      - ${HOME}/diskover/redis:/data
4. Increase the mmap index limit for Elasticsearch with the following command:
sudo sysctl -w vm.max_map_count=262144Note that this setting doesn't persist after reboot. Update vm.max_map_count in /etc/sysctl.conf to make it persist across restarts.
5. Create the directories for elasticsearch and redis:
mkdir elasticsearch
mkdir elasticsearch/data
mkdir redis

sudo chmod 777 -R elasticsearch
sudo chmod 777 redis
6. Start up diskover:
sudo docker-compose up -d7. Check that diskover is running by navigating to diskover in your browser:
<Local server IP address here>:3000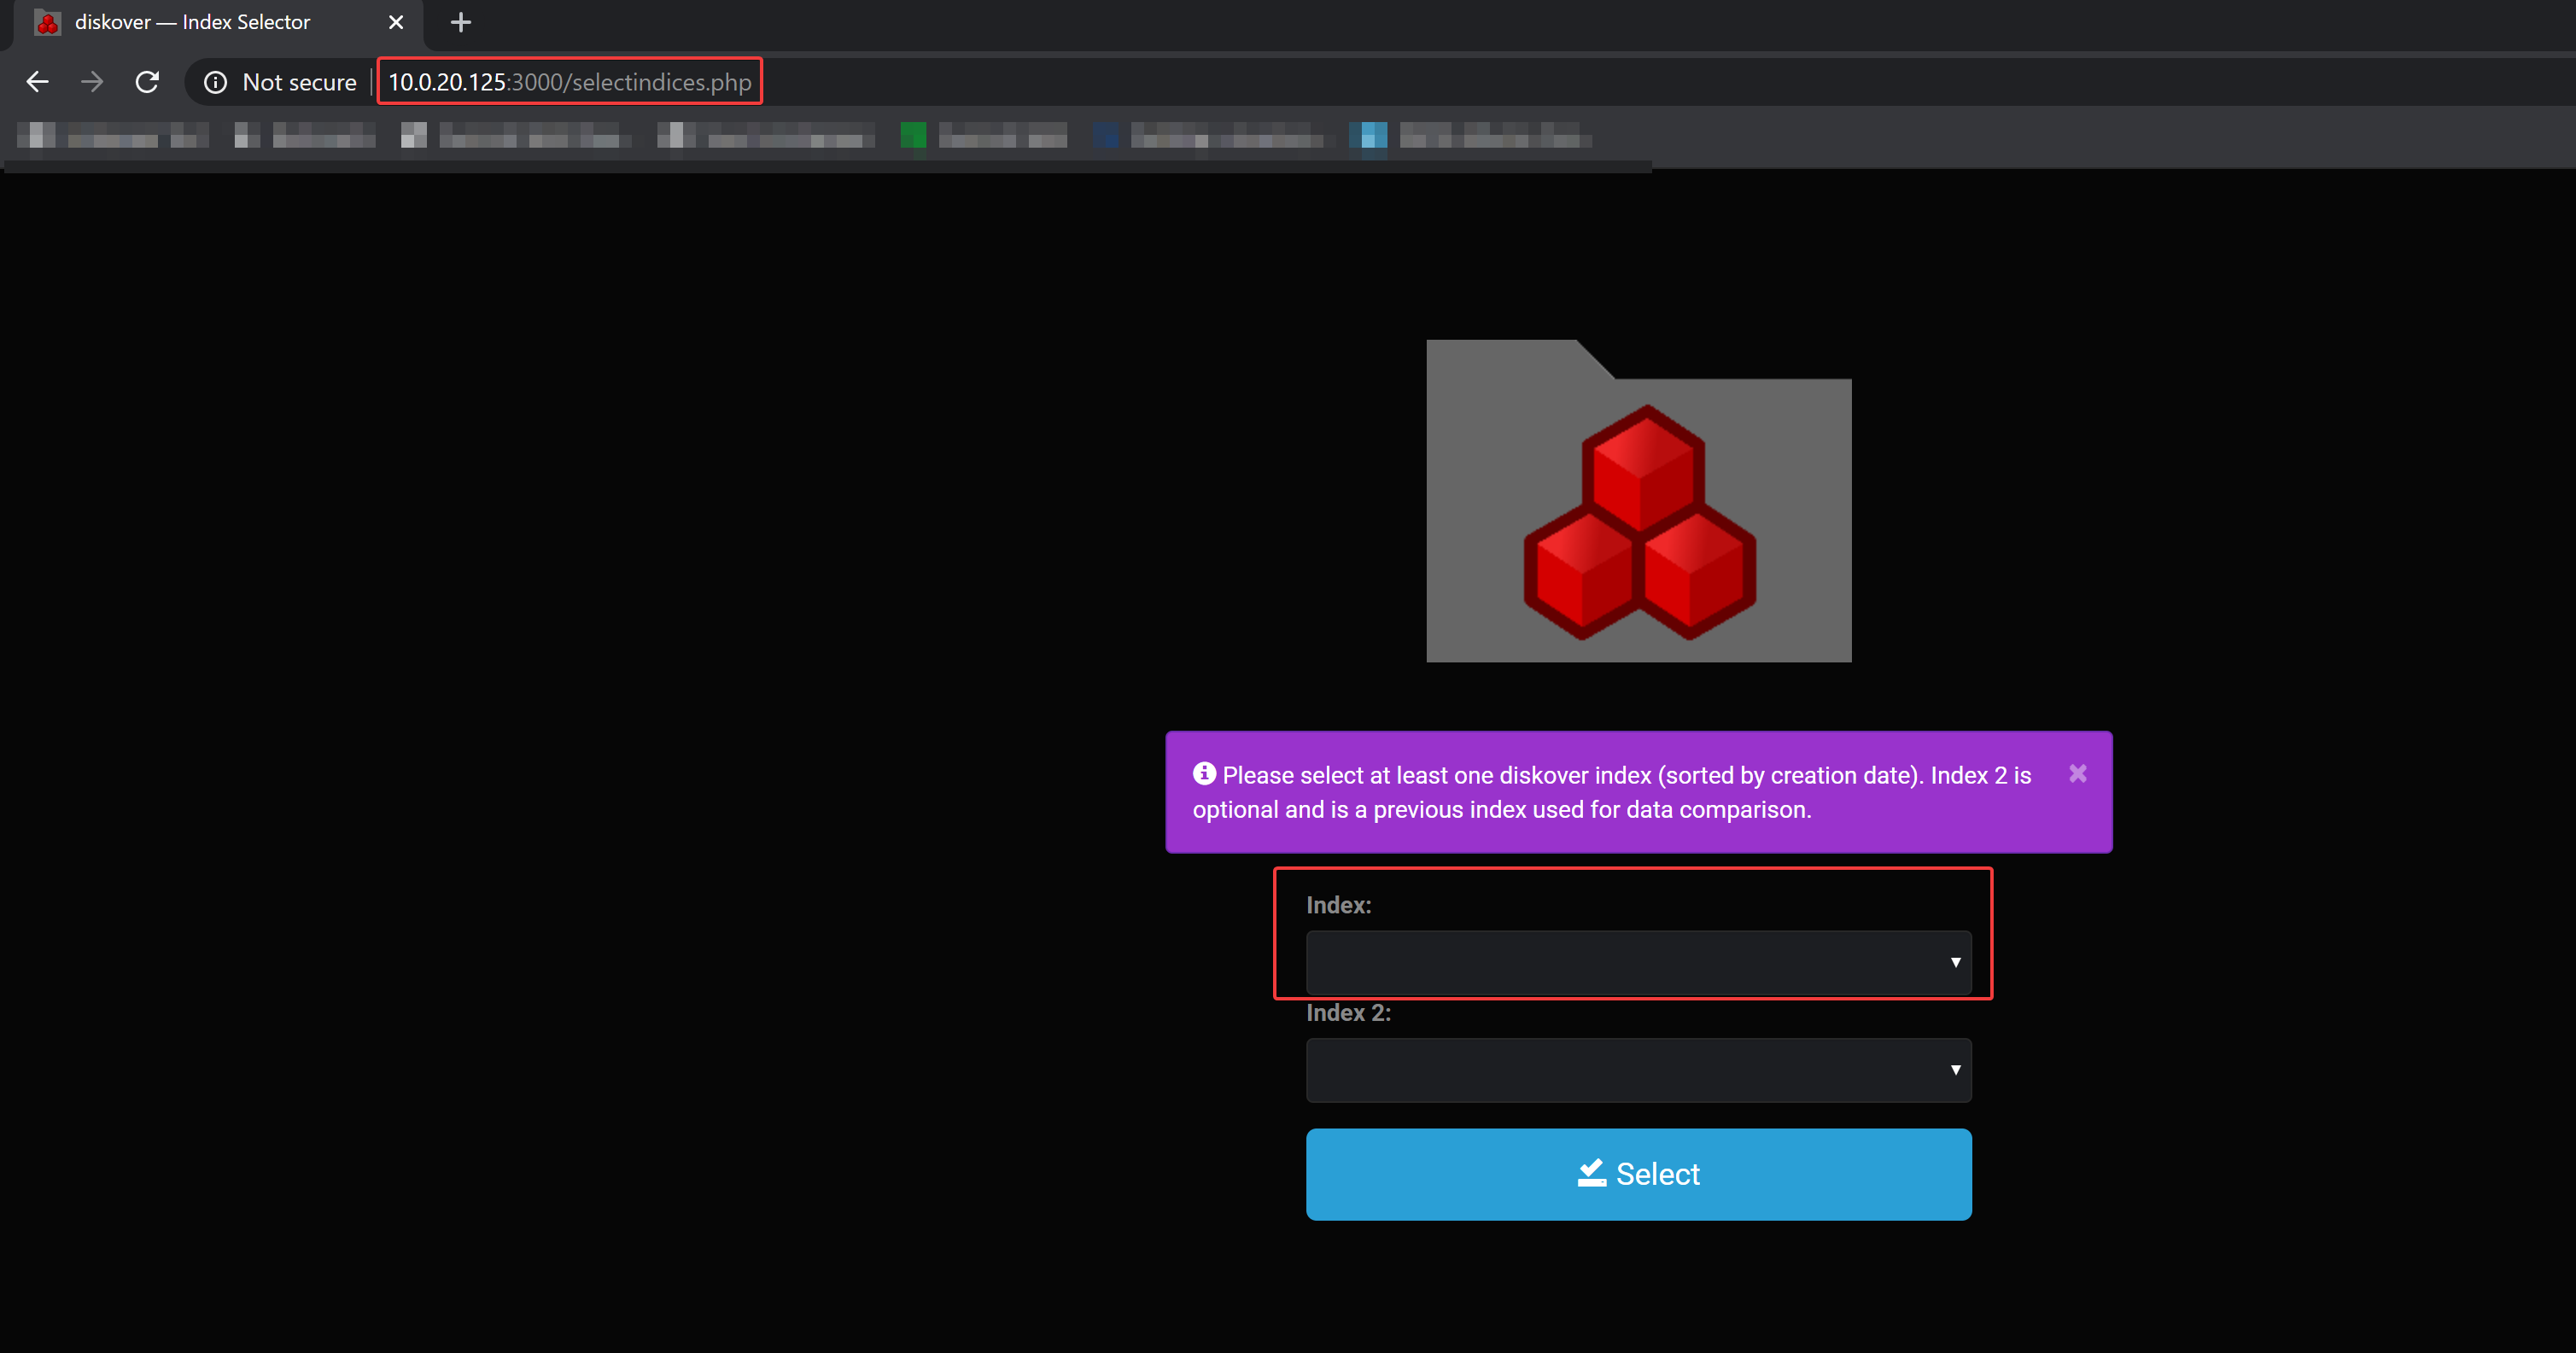
Note, after you start the Diskover container, it will kick off an indexing task, which can take a while to complete. Refresh the browser and you should be able to select your new index when it is complete.
Optional, but highly recommended: Hide meaningless data
When you run Diskover, you are likely to see a very large directory, /data/proc, which contains a massive file, kcore, which can be on the order of 128TB. This isn't a real file- it just represents virtual RAM allocation to the kernel. Its presence skews your reports in Diskover and therefore I recommend that you avoid indexing it. This can be accomplished by navigating to ./diskover/config/diskover.cfg and adding "/data/proc" to the excludes section of the config:
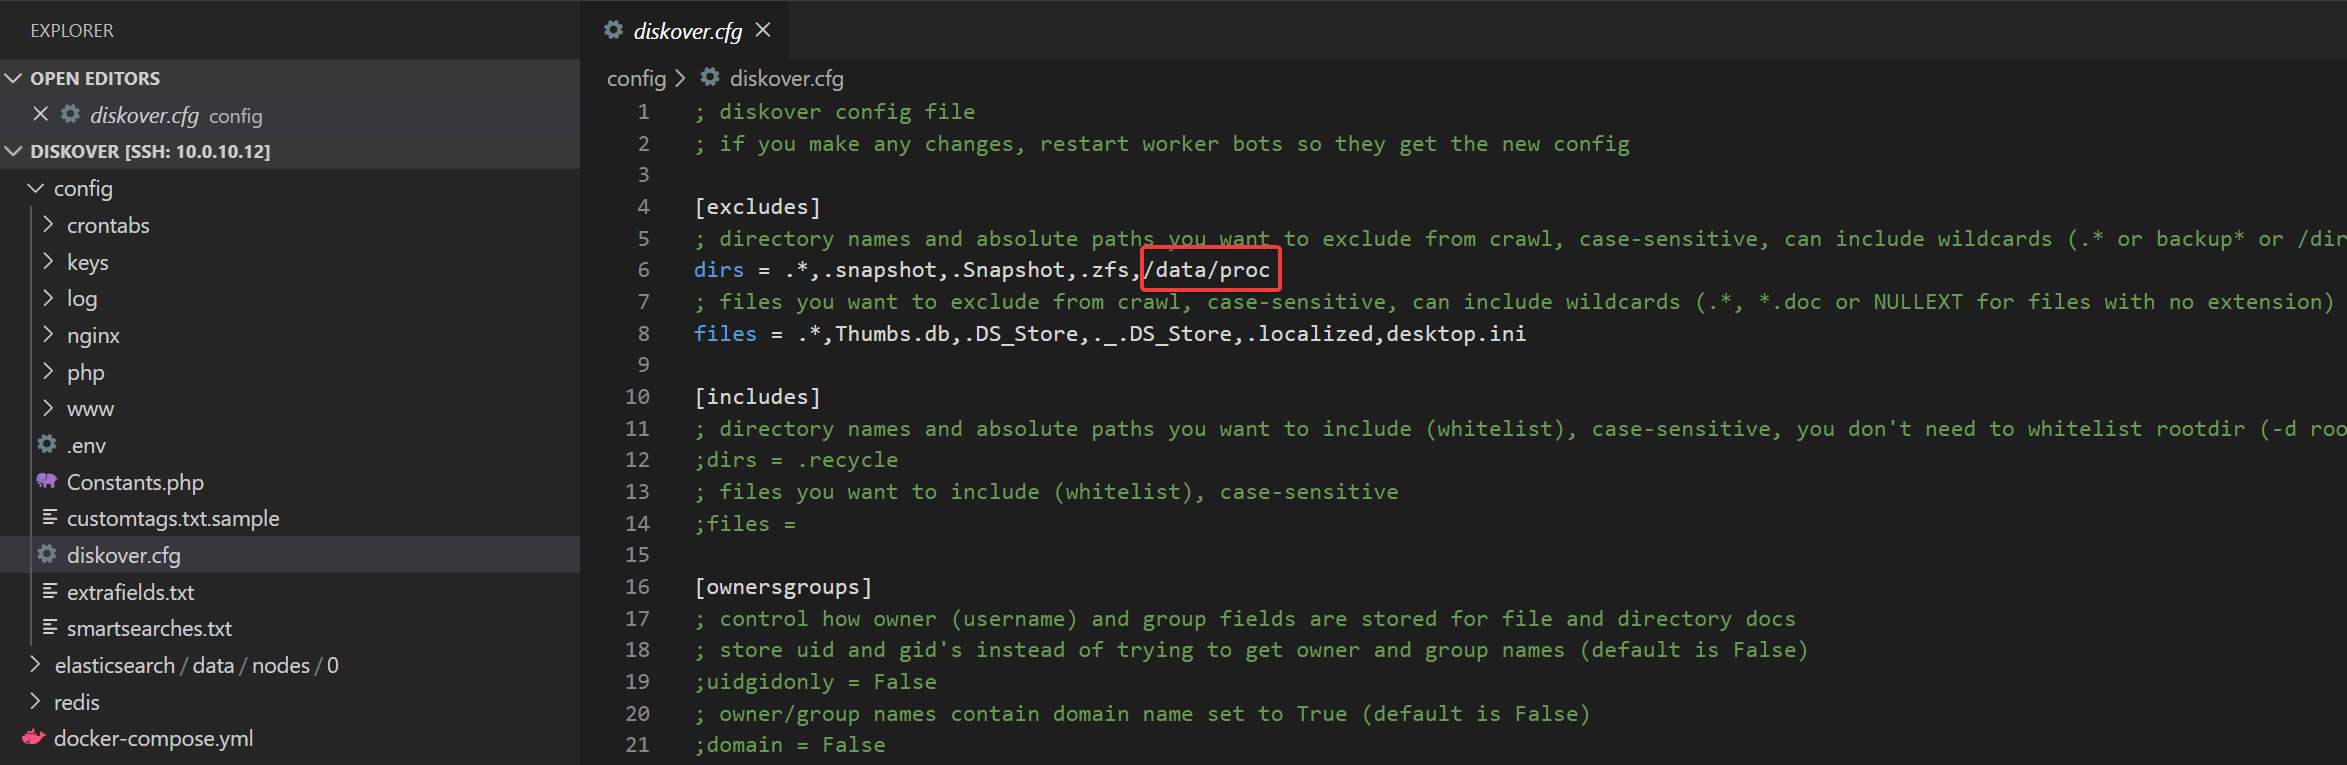
Congratulations, you have now successfully deployed Diskover using docker-compose!
Analyzing Disk Usage with Diskover:
With Diskover installed, let's do a quick intro on how to use Diskover to figure out what is using your Linux disk space and identify what is causing your server's storage growth.
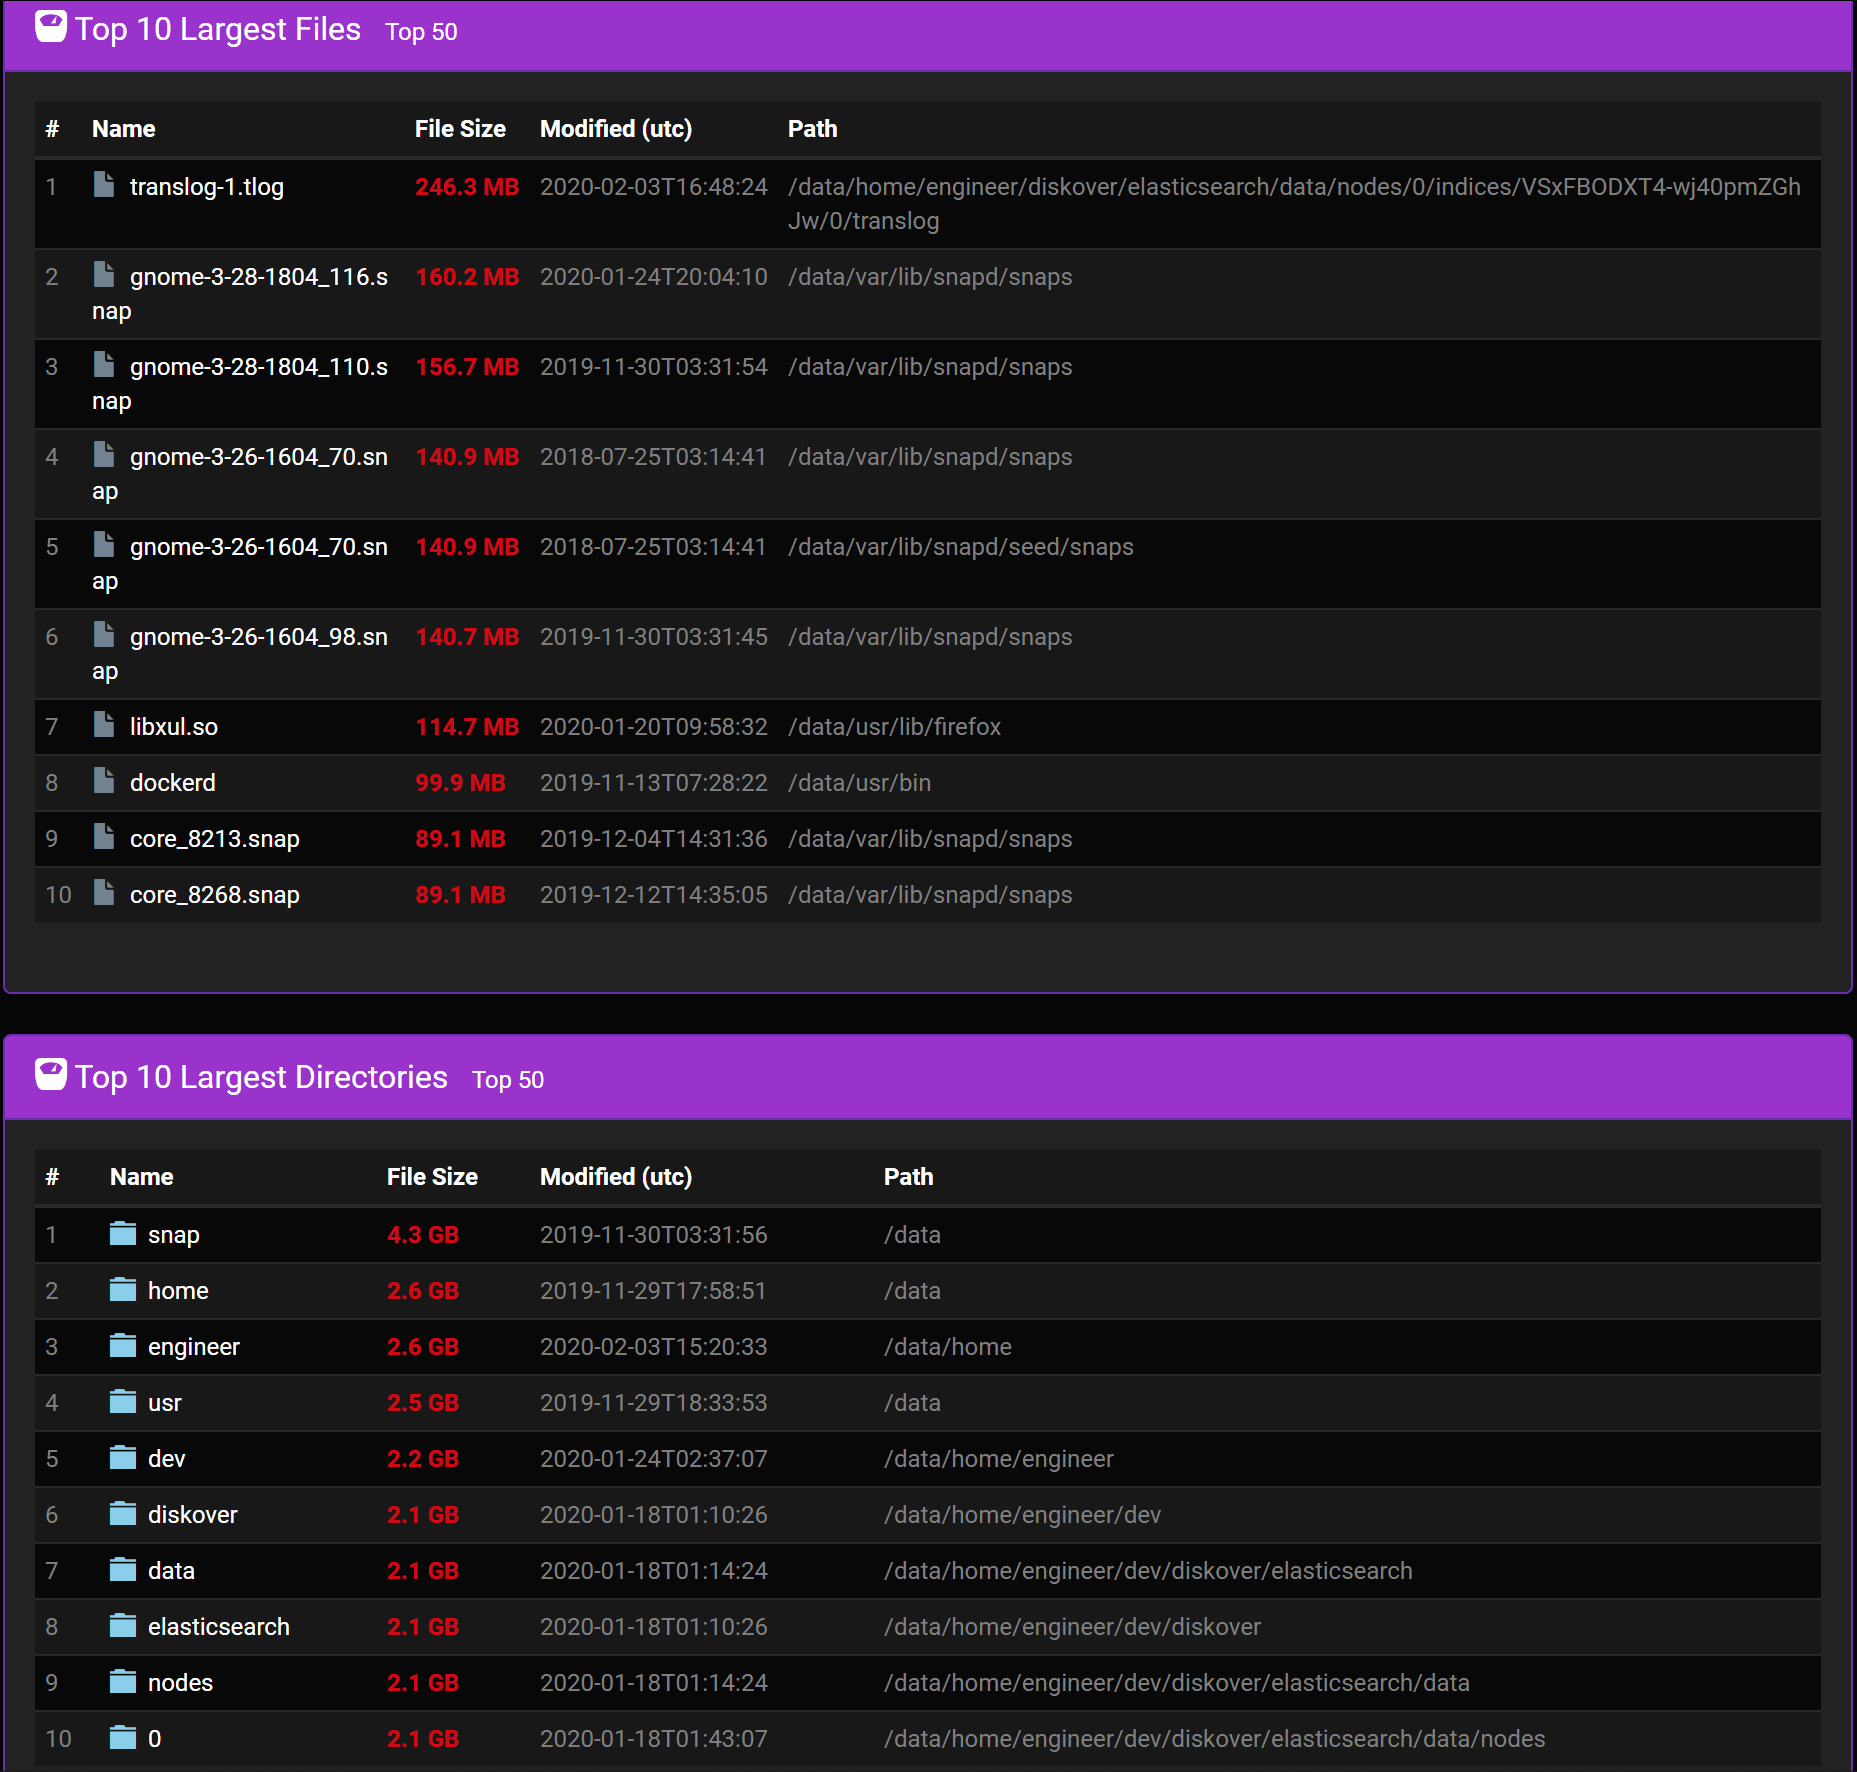
How To Find What Is Using the Most Disk Space
There are a few places in Diskover where you can see what directories and files are taking up the most space. One is the main dashboard which you land on after selecting an index:
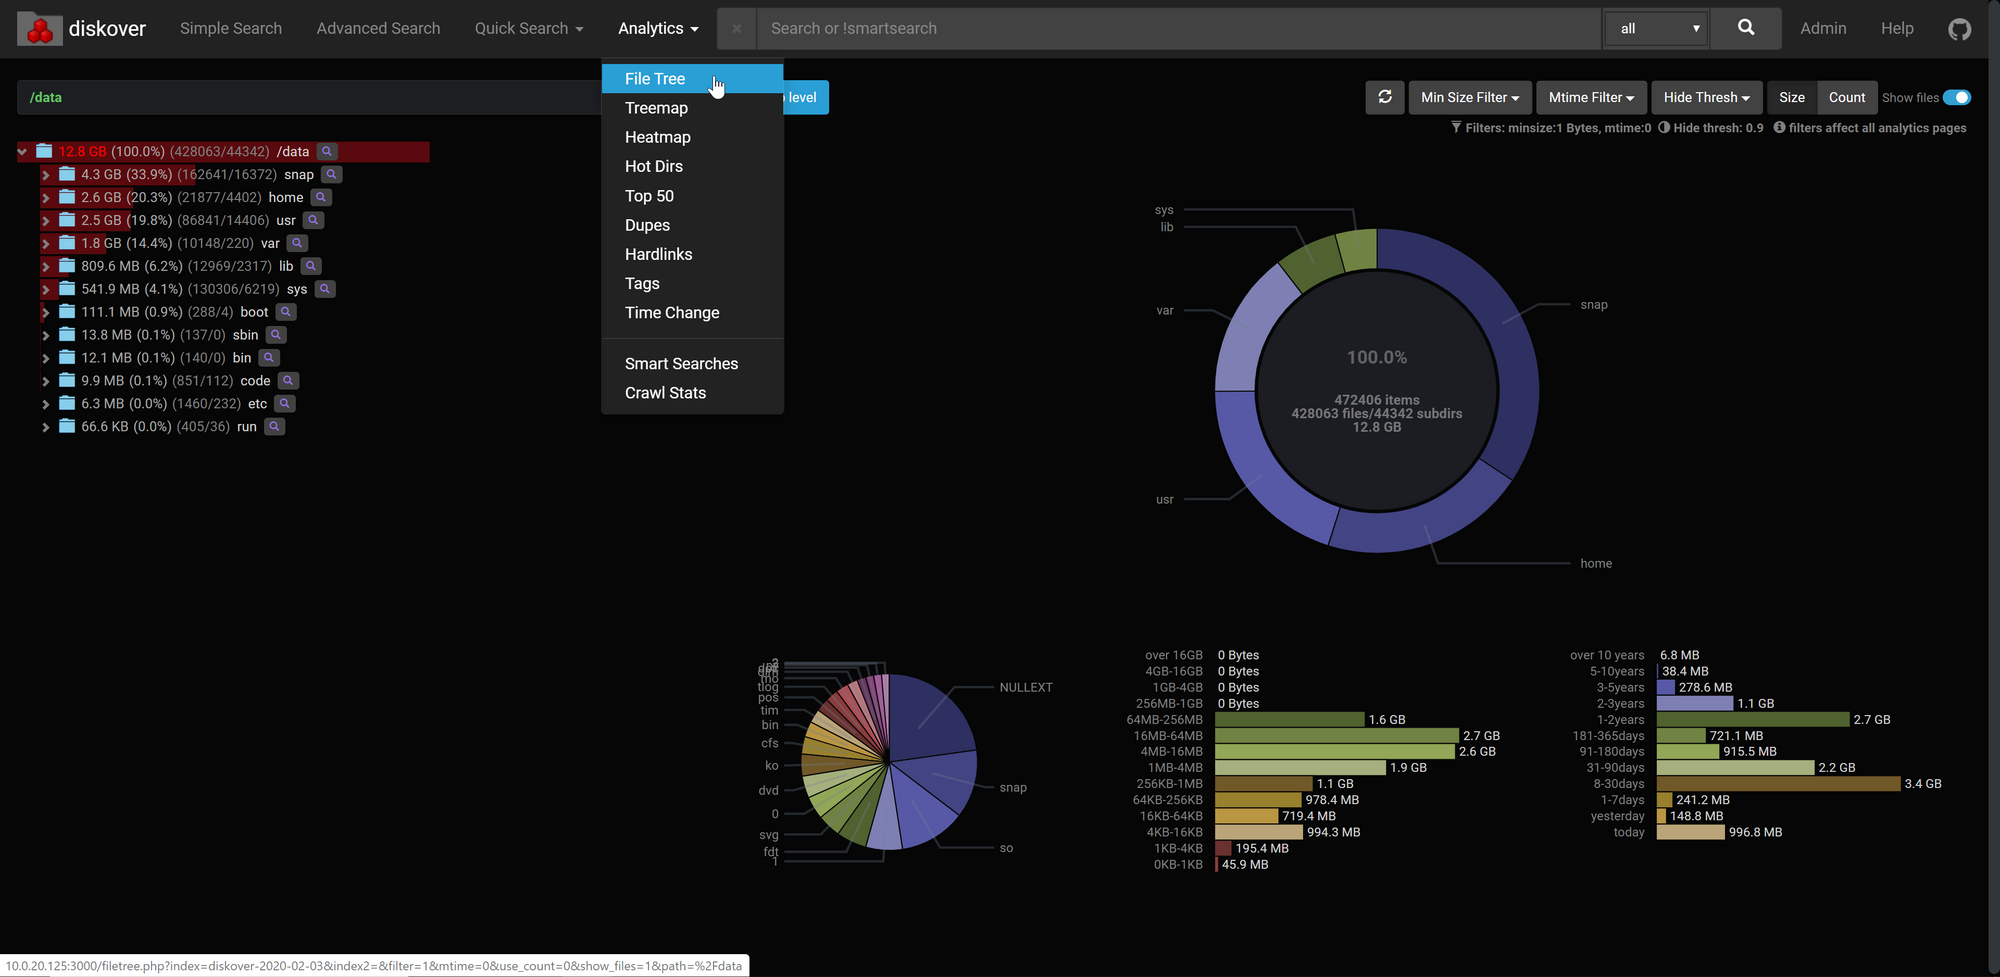
Another is the file tree (found under Analytics > File Tree):
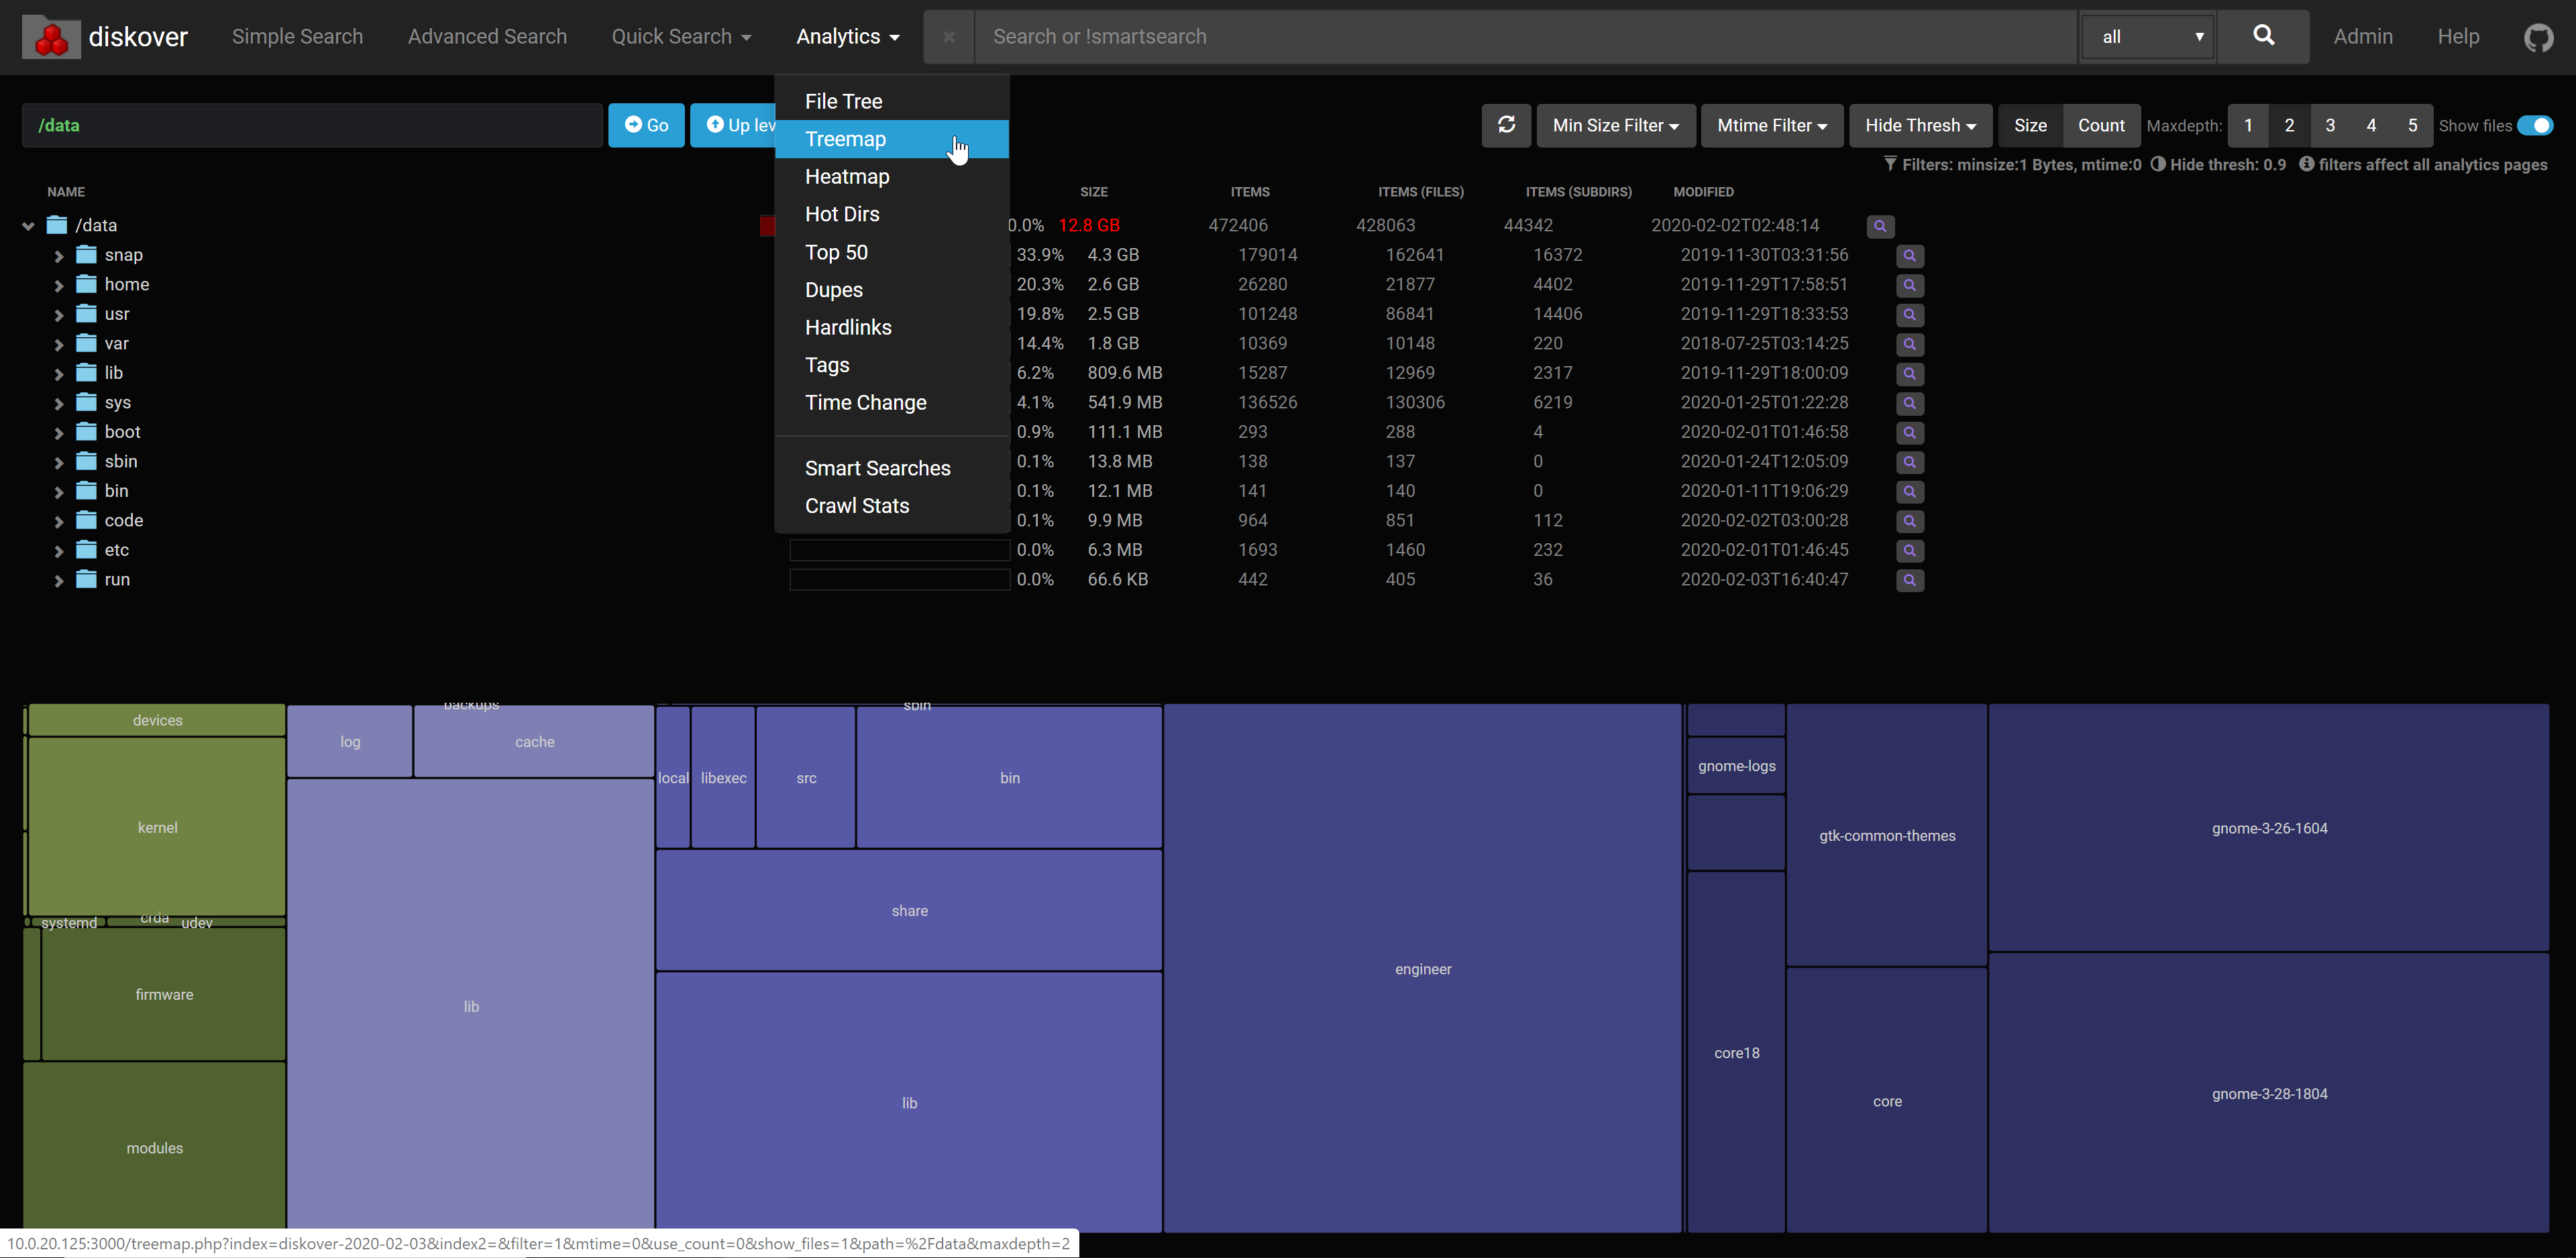
And finally, the treemap (Analytics > Treemap):
How to Find Why Your Used Disk Space Is Growing
Monitoring disk growth is where Diskover really shines.
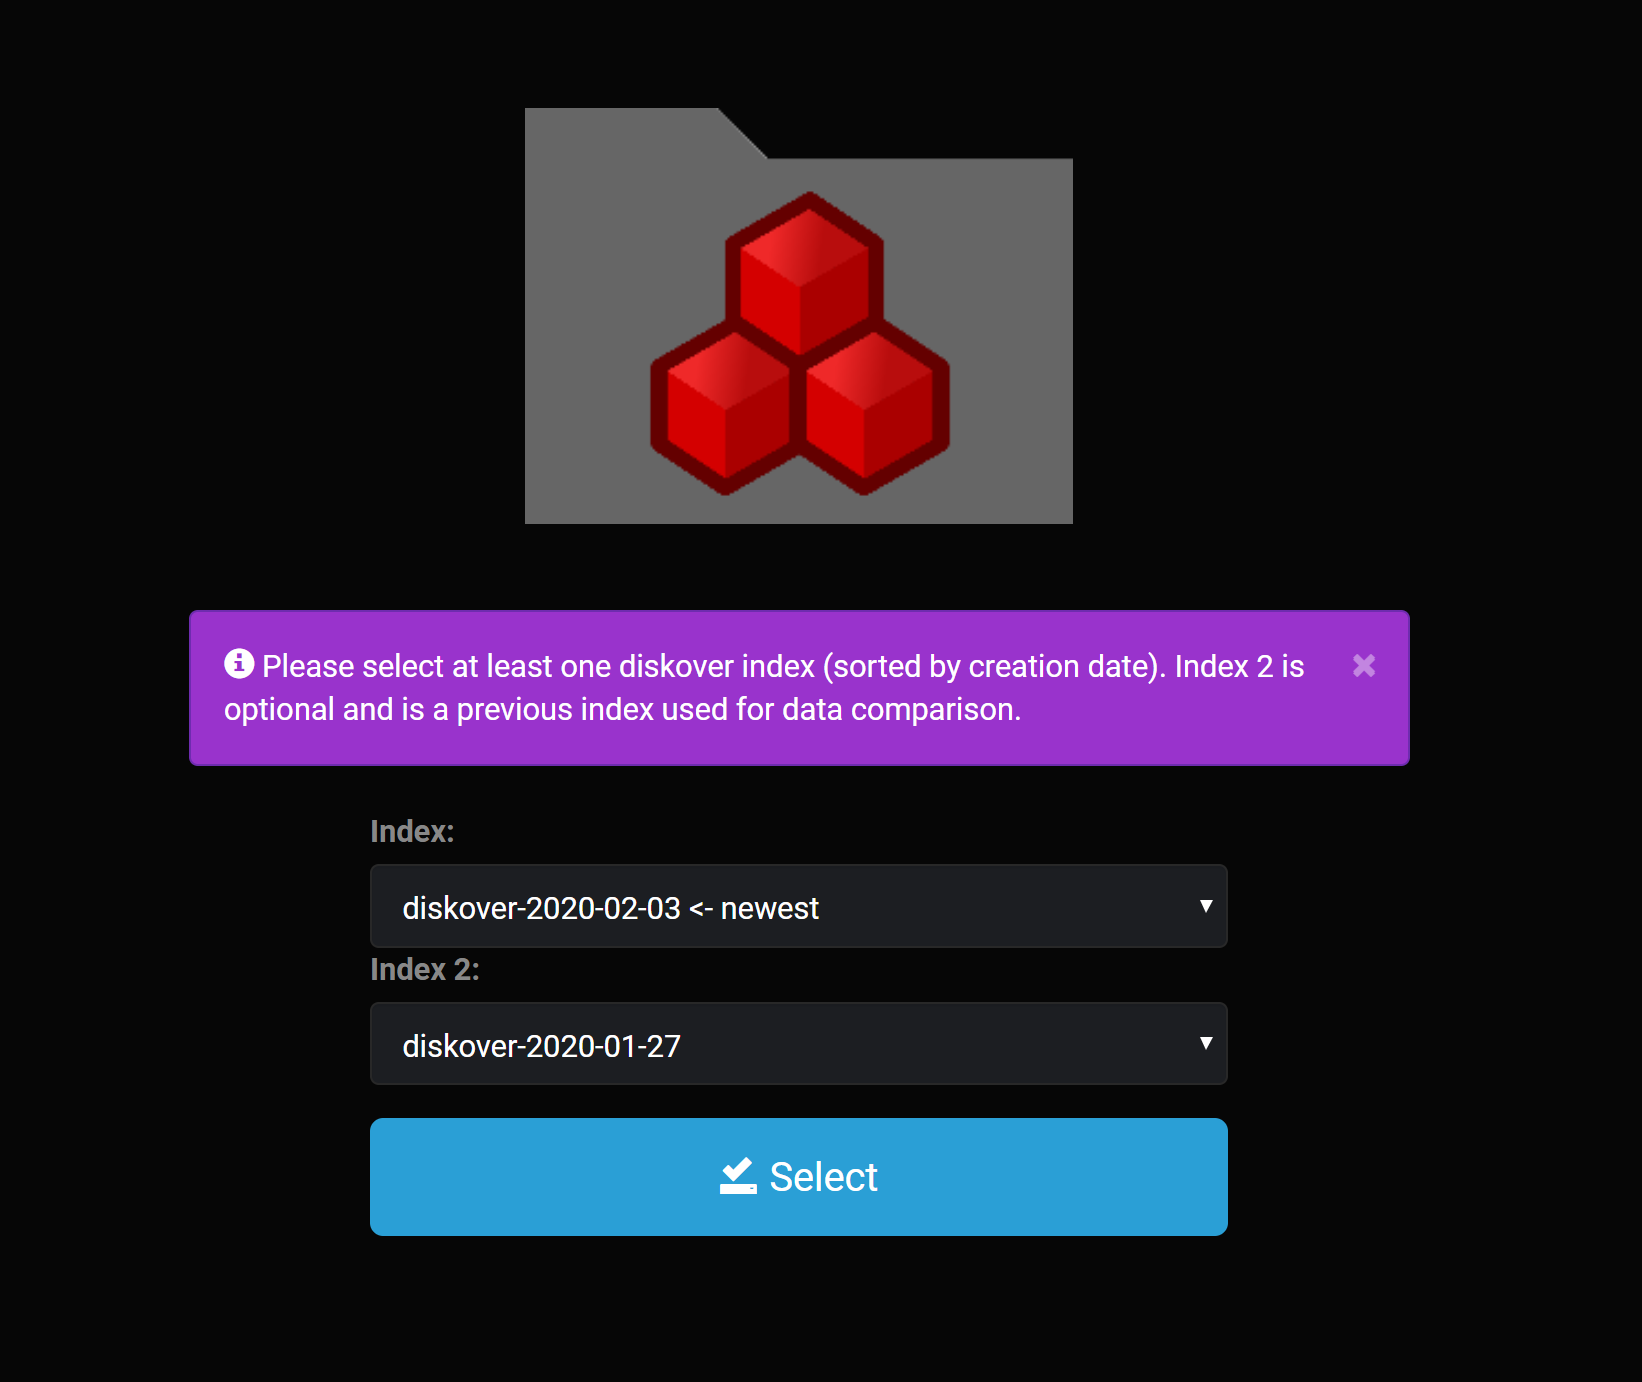
This should be obvious but, in order to monitor disk growth, Diskover needs something to compare against. In other words, it needs two indices to compare before and after. This is what that second index selection is for on the initial page.
With our current docker-compose file, Diskover is set up to run as a daily cron job (USE_CRON=true), so if you're deploying this today, you should be able to run your first growth comparison report tomorrow. I typically select indices so that I am comparing over the course of a week:
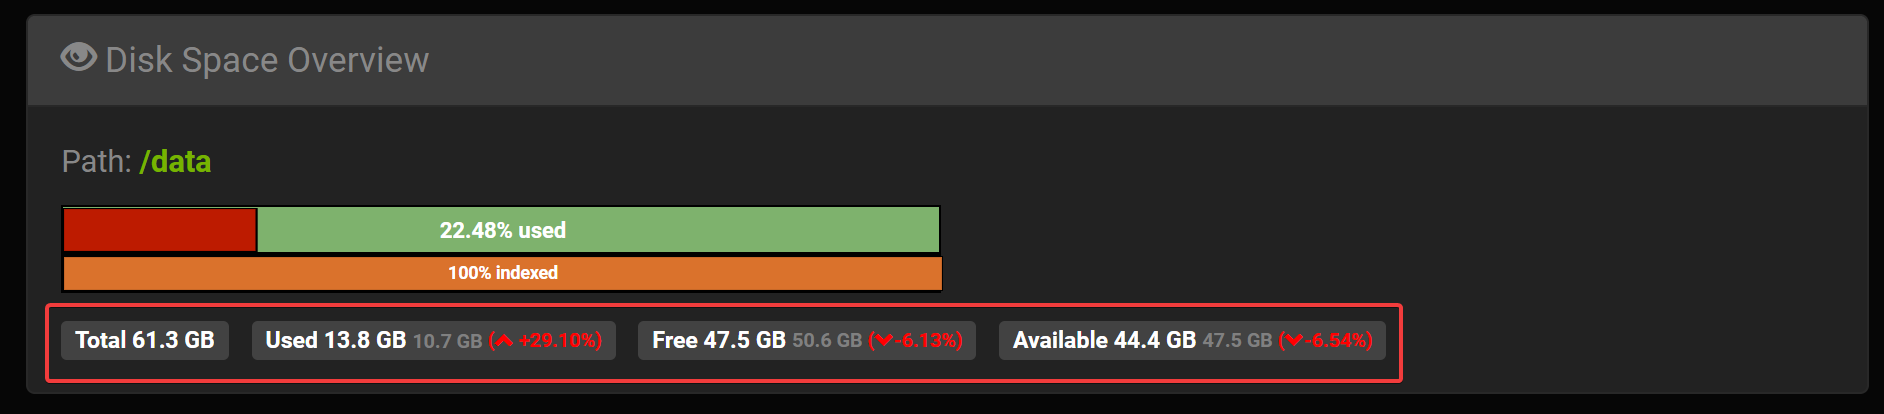
Diskover gives you an overall macro view of total disk growth on the landing dashboard:
But, by far the most impressive and useful feature of Diskover is analyzing disk growth with the heatmap (Analytics > Heatmap):
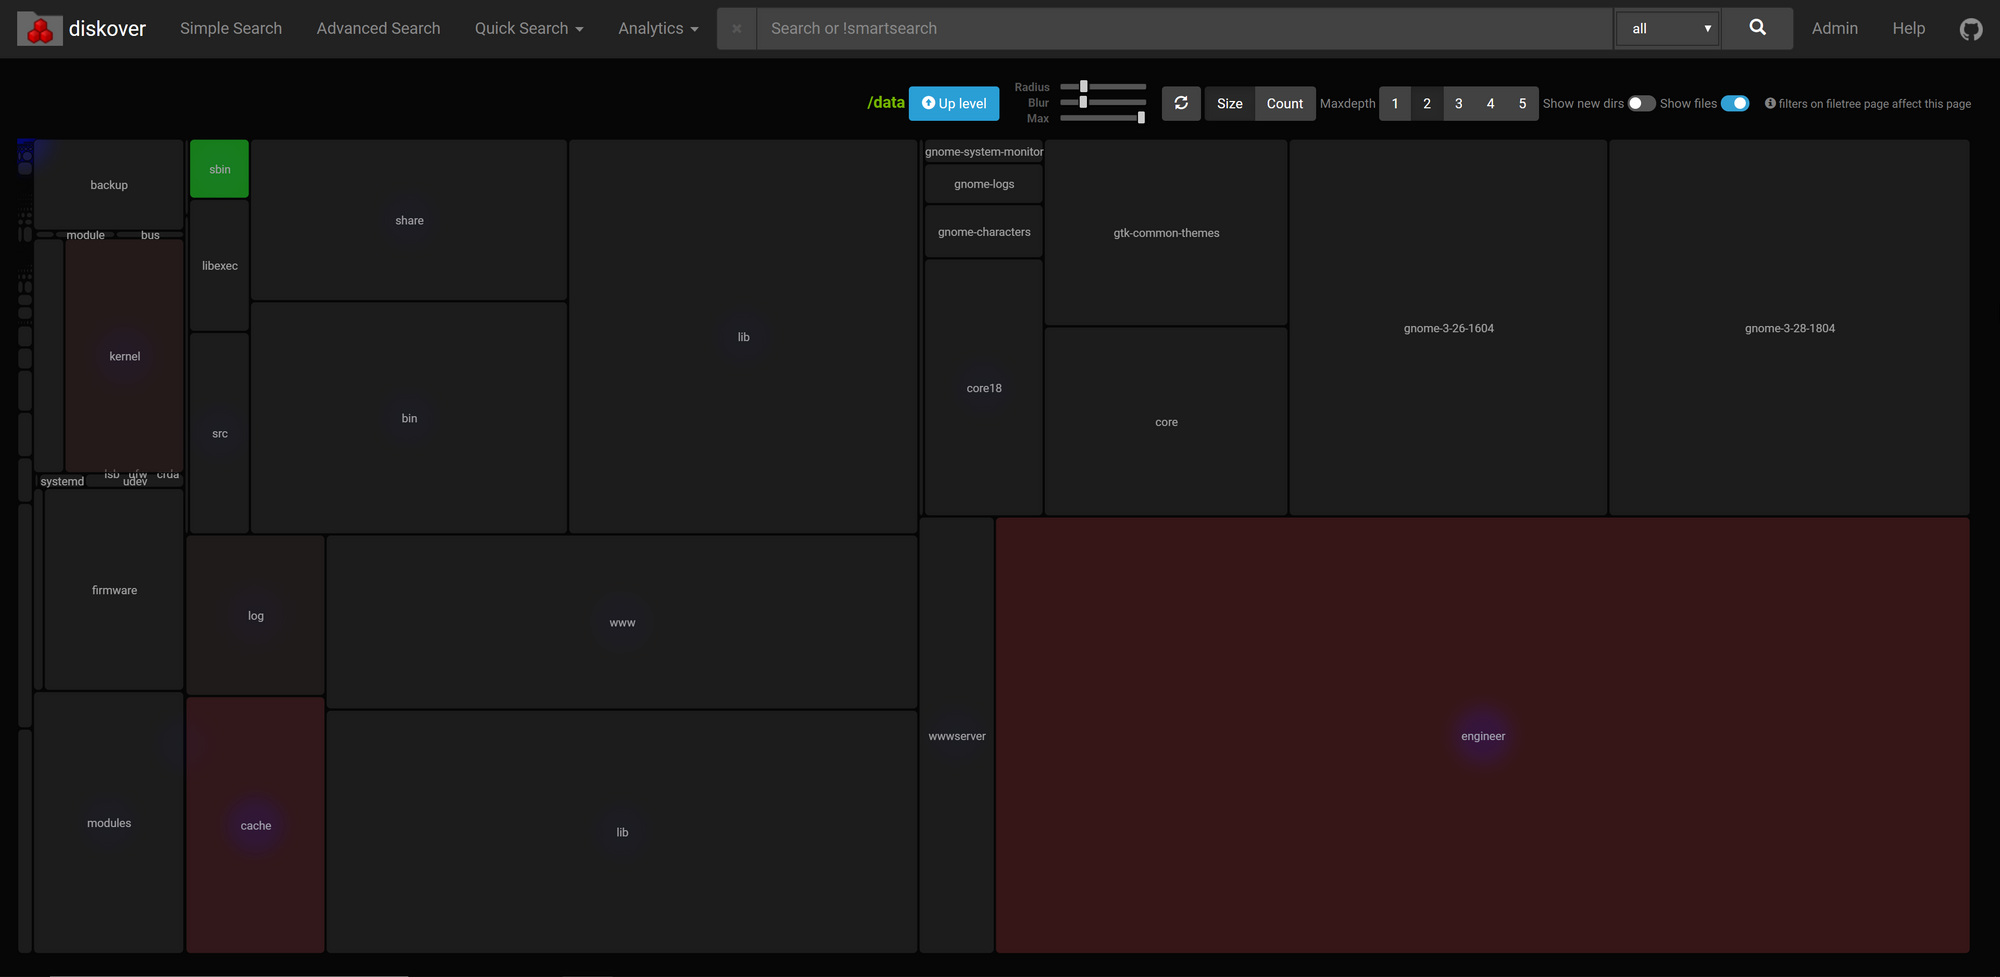
Relative changes in directory size are emphasized by color changes: green for a decrease and red for an increase. We can dive deeper into what is driving directory growth by simply clicking on them:
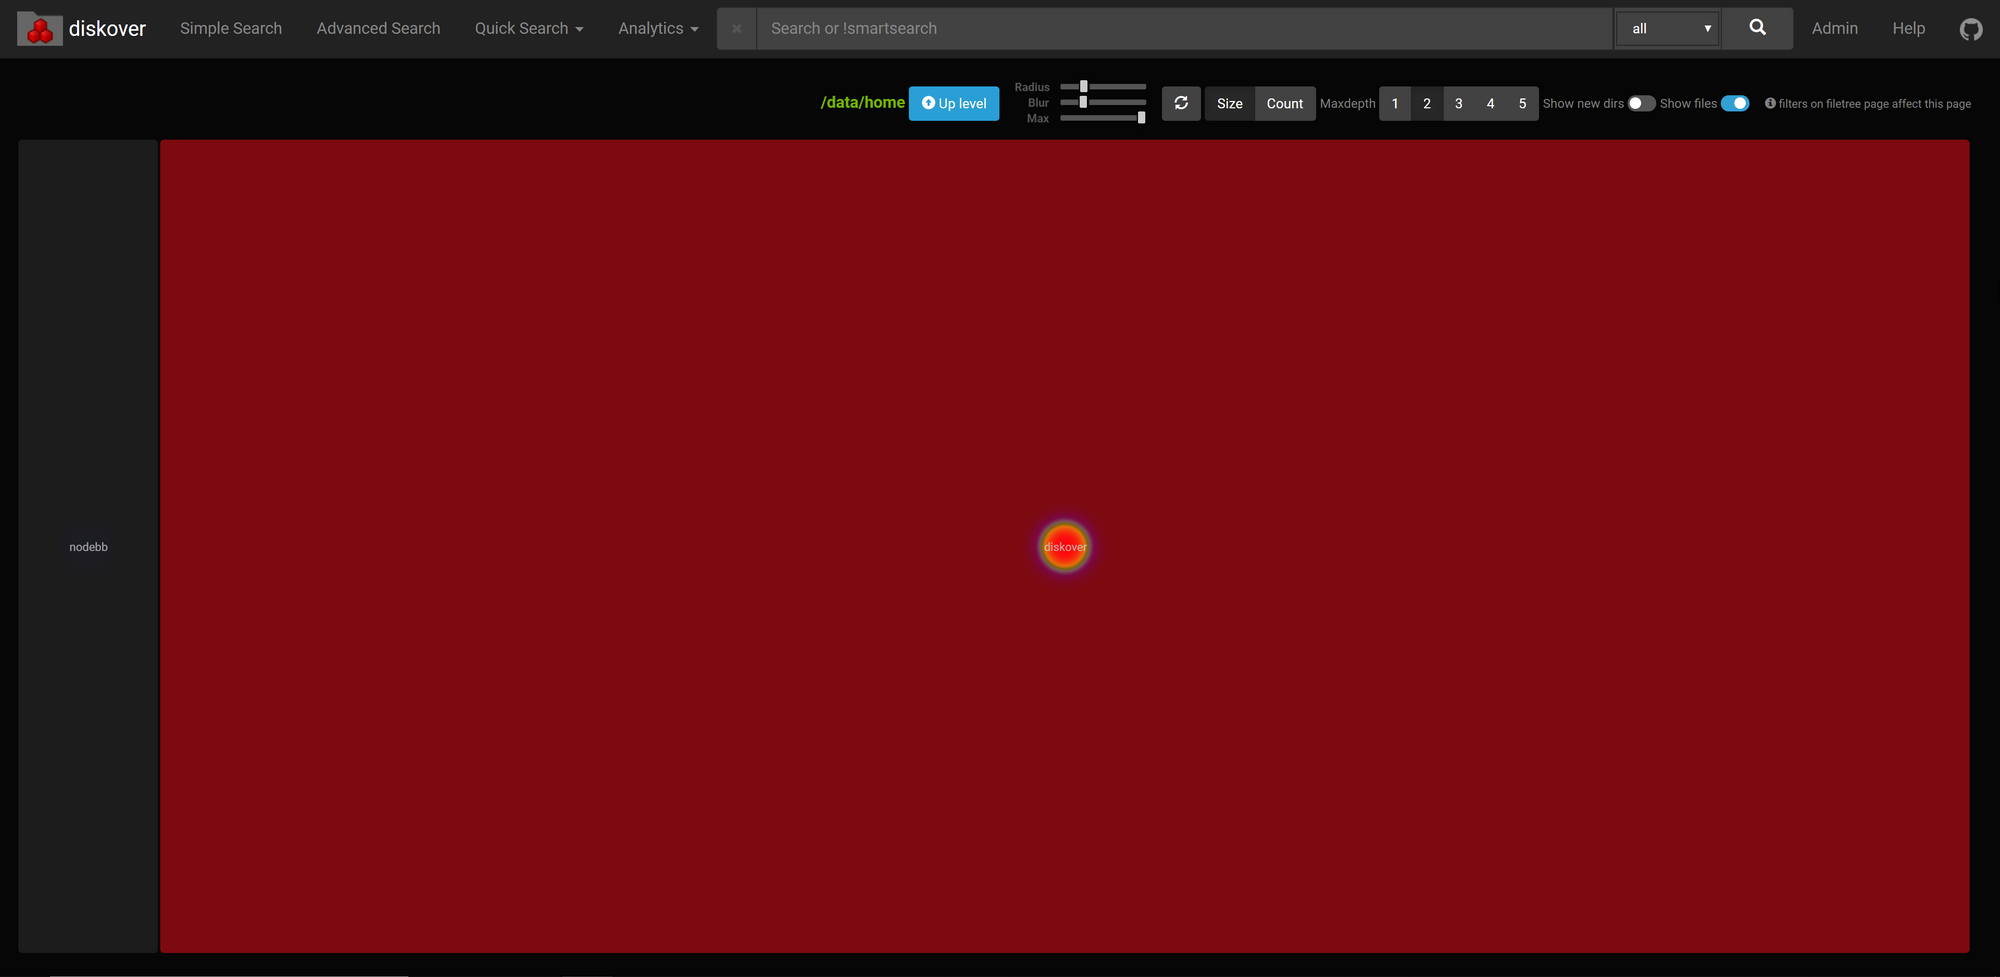
As you can see here, the diskover directory size is increasing dramatically. Incidentally, this shows why you should regularly purge your elasticsearch database if you're running diskover on a cron job. This can easily be done from the "Admin" menu in the top right.
You're now up and running with Diskover. If you run into any trouble, ask away! Let me know what kind of insights you discover with Diskover in the comments below!