FileZilla is an incredibly useful FTP client for transferring files between your workstation and servers. In this tutorial, I will walk you through updating/installing FileZilla on Ubuntu without using the repository. In general, if you want the latest and greatest features, try to avoid repositories- the apps in repositories are often outdated. I also feel like a repository is a crutch in that it obfuscates how your software is actually installed on your Linux system.
I can already hear the outrage now; I'm not saying that repositories are worthless. They greatly reduce maintenance when it comes to keeping your system (relatively) up-to-date. Downloading, extracting, and compiling every application from source would be hugely impractical. I use repositories for things that either I don't use very often or that I don't care about having the latest version of. For apps that I use often, where I care about having the latest, I handle those manually. Now, on to the tutorial.
1. Obtain your update files.
Obtain your update files. If you already have FileZilla installed, FileZilla checks automatically for updates at launch and downloads them to your home downloads folder. If you don't have FileZilla already, download it here.
2. Navigate to your downloads folder.
Navigate to your Downloads folder and find your FileZilla tar file. I'll admit I use the Files GUI app that comes with Ubuntu most of the time. Right click and select "Open in Terminal" (or just open a terminal with Ctrl + Alt + T and just type cd ~/Downloads/).
3. Extract your tar file.
Extract your tar file using the following command:
tar -vxjf FileZilla_3.40.0_x86_64-linux-gnu.tar.bz2This will extract the file to a directory in your Downloads directory called FileZilla3. You should now have the following:
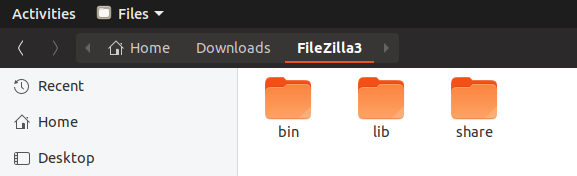
Notice this extraction contains a bin directory, implying that it's ready to run (no compilation necessary).
4. Move your extracted files to their final location.
Let's move this folder to our /opt/ directory with:
sudo mv ./FileZilla3/ /opt/But wait! If you've already, installed, you'll get the following error:
mv: cannot move './FileZilla3/' to '/opt/FileZilla3': Directory not emptyEven with sudo, mv will refuse to merge a directory. It's a nice guardrail. In our case though, we do want to merge. For that, we'll use rsync:
sudo rsync -a ./FileZilla3/ /opt/FileZilla3/Warning: DO NOT FORGET to add the /FileZilla3/ directory to /opt/ like it shows above. If you simply did /opt/ you'd wipe out your entire /opt/ folder and be left with only FileZilla3.
And with that, we're done!