
It's common for a kernel update to break an otherwise functional system. In this guide you will learn how to change the default kernel on Proxmox.
When is an upgrade not an upgrade? Simple- when it breaks your server. Tonight, as I was running through my homelab maintenance list, I updated my Proxmox server and rebooted it. To my surprise, when the server came back up, VM 130 failed to boot. (By the way, this is why I put a moratorium on all updates 1-2 weeks before a trip in the Unattended Server Checklist; best not to introduce potential new issues in an otherwise stable system. Not to mention, the last thing you want is to be stuck troubleshooting something when you need to be heading to the airport.) 🙄
Anyway, since VM 130 was the only virtual machine that failed to boot and since VM 130 also happens to be the only VM that boots from a USB drive, I reasoned that this boot failure was most likely caused by the Proxmox Linux kernel update. Rolling the Proxmox kernel update back to the previous version resolved the issue. In today's guide, you will learn how to change the default kernel when booting on Proxmox.
How to Rollback a Proxmox Kernel Update
The job of loading the Linux kernel into memory is the job of the bootloader. In Proxmox, this bootloader is known as GRUB (technically grub2) and therefore it follows that if you want to change which kernel loads in Proxmox, you need to configure that in grub. The following will walk you through downgrading to a previous kernel version in Proxmox (though it should work for any Linux distribution that uses GRUB such as Ubuntu/Debian).
N.B. This guide assumes you are using the standard Proxmox install. It will not work if you are using ZFS, as the Proxmox ZFS install does not use grub as its bootloader but rather uses systemd-boot.
Find Linux Kernel Menu Entries
The first step in changing your default Proxmox kernel is to identify the kernel entry and the menu paths necessary to get there. This can be done with the following command:
sudo grub-mkconfig | grep -E 'submenu |menuentry 'This command should return a list of previous kernel versions and their corresponding menuentry:
Generating grub configuration file ...
Found linux image: /boot/vmlinuz-5.13.19-4-pve
Found initrd image: /boot/initrd.img-5.13.19-4-pve
menuentry 'Proxmox VE GNU/Linux' --class proxmox --class gnu-linux --class gnu --class os $menuentry_id_option 'gnulinux-simple-zzz' {
submenu 'Advanced options for Proxmox VE GNU/Linux' $menuentry_id_option 'gnulinux-advanced-yyy' {
        menuentry 'Proxmox VE GNU/Linux, with Linux 5.13.19-4-pve' --class proxmox --class gnu-linux --class gnu --class os $menuentry_id_option 'gnulinux-5.13.19-4-pve-advanced-zzz' {
Found linux image: /boot/vmlinuz-5.13.19-3-pve
Found initrd image: /boot/initrd.img-5.13.19-3-pve
        menuentry 'Proxmox VE GNU/Linux, with Linux 5.13.19-3-pve' --class proxmox --class gnu-linux --class gnu --class os $menuentry_id_option 'gnulinux-5.13.19-3-pve-advanced-zzz' {
Found linux image: /boot/vmlinuz-5.13.19-2-pve
Found initrd image: /boot/initrd.img-5.13.19-2-pve
        menuentry 'Proxmox VE GNU/Linux, with Linux 5.13.19-2-pve' --class proxmox --class gnu-linux --class gnu --class os $menuentry_id_option 'gnulinux-5.13.19-2-pve-advanced-zzz' {
First, identify the "Advanced options" submenu. Then find your desired Linux kernel and identify its menuentry. In my case, Linux 5.13.19-4-pve is broken, so I'm after the Linux 5.13.19-3-pve menuentry. For the sake of example, these entries have been highlighted in bold above and recorded below.
Advanced Options Submenu: Advanced options for Proxmox VE GNU/Linux
Kernel Menuentry: Proxmox VE GNU/Linux, with Linux 5.13.19-3-pve
Modify grub Configuration File
The next step is to modify the grub configuration file with:
nano /etc/default/grubAnd add the following entry using the menu entries you found above:
GRUB_DEFAULT="{ADVANCED OPTIONS SUBMENU VALUE}>{KERNEL MENUENTRY VALUE}"In our current example, this would be:
GRUB_DEFAULT="Advanced options for Proxmox VE GNU/Linux>Proxmox VE GNU/Linux, with Linux 5.13.19-3-pve"Note that there may already be a GRUB_DEFAULT=0 line in the grub configuration. Be sure to comment that out by adding a # symbol in front of it, i.e. #GRUB_DEFAULT=0.
Save the updated grub configuration.
Note that you can also do the same with the more-specific menuentry_id_option. These are highlighted in italics in the example, so you would end up with someting like:
GRUB_DEFAULT="gnulinux-advanced-yyy>gnulinux-5.13.19-3-pve-advanced-zzz"
Update grub
Finally, update grub with:
update-grubReboot for changes to take effect.
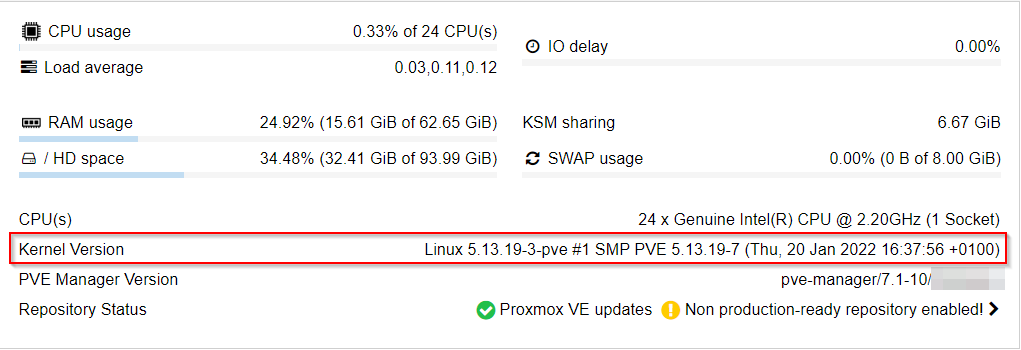
Verify Kernel Version In Use
After rebooting, you can verify that the kernel version in use is, in fact, your desired version with:
uname -rAlternatively, you can also use the Proxmox GUI's node summary:
Note that the above should work for any Ubuntu/Debian-based Linux distribution.
Gotchas/Troubleshooting
If the above doesn't work for you, make sure you've checked the following:
- Make sure you're not using the Proxmox ZFS install. It doesn't use GRUB.
- Make sure you've commented out the
GRUB_DEFAULT=0that may be in your default grub configuration. - Double check your menu entries.