
The easiest, quick step-by-step guide for accessing your homelab network remotely via a reverse SSH tunnel on a Raspberry Pi (or any other Debian/Ubuntu device).
I travel a lot, which means that often my homelab is left unattended. If something goes wrong, I obviously don't have physical access to my network. This used to be a source of anxiety for me, until I analyzed my homelab loadout and identified key points of failure. Once I had identified these key points of failure, I came up with a strategy for being able to handle them, leading to the creation of my Unattended Server Checklist.
Normally, I connect to my homelab remotely via VPN which tracks my homelab's public IP address via a dynamic DNS service. However, if my IP address changed (as could happen in the event of a power outage), and for some reason my dynamic DNS service also failed, I would not be able to VPN into my homelab network. Alternatively, my VPN server could just outright fail.
Therefore, I need an alternate way to access my homelab when I am remote to it. I could build a second, redundant VPN server, and that's probably not a bad idea, but it's not in the budget right now and it's prone to the same risks.
My solution? A reverse SSH tunnel.
In this guide, I will walk you through the steps to create the easiest reverse SSH tunnel so that you can remotely access a device on your homelab securely and easily.
What Is A Reverse SSH Tunnel?
If you've been following my blog, you're undoubtedly familiar by now with SSH. If you're not, think of it as a secure terminal that allows you to connect to a remote host. For those of us with a homelab, we're typically on the same network as the device and so SSH is simple. However, when you're trying to SSH into a host remotely, this isn't as easily accomplished due to your router's NAT (network address translation) and firewall. To get around this, you'd have to open up port 22 on your router and port forward it to your RPi. A lot of people do this, but I see it as a needless risk. If you ever review your pfSense logs, you'll see that you're being scanned all the time for open ports. The crown jewel of hackers is port 22. They want to add you to their botnet. Sure, there are ways to secure your SSH server, but why do it if you don't have to? Limit your attack surfaces.
Alternatively, you can keep port 22 closed and when you need to SSH into a device remotely, you just VPN in and then, once you're on the network, establish an SSH connection like you normally would. This is what I normally do, but this is dependent on your VPN being alive and that may not be the case. Again, redundancy.
So, back to reverse SSH tunnels. Since your attempted SSH traffic from outside the network splatters on the firewall's windshield, how do we connect? The answer is, "we" on our local laptop outside of the homelab don't. We instead allow the remote device on the homelab SSH into us. (It's remote relative to us- we're on our local laptop, the homelab being on a different network is remote to us). Once the connection is established, we redirect the port, allowing us to use the established connection to SSH into the remote host. The image below illustrates this concept. It's the stuff of nightmares for corporate IT security admins because it's subverting their firewall- we've bypassed it.
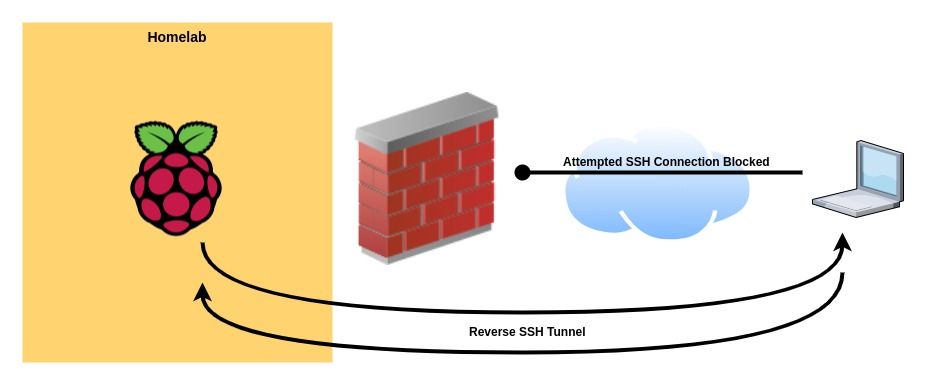
Now, there's still one problem with this whole idea. Chances are, if we're working remotely, we ourselves are also behind another router, one that we don't control. That router, like our homelab's own router/firewall, also won't allow a remote device to establish an SSH connection across it. To overcome this, you'd have to establish a server outside of your homelab that your homelab's device could SSH into to establish the reverse SSH connection. It would be this remote server that you yourself would remote into. This server is often called a "mothership" and we refer to this connection between the remote homelab host and server as "phoning home to the mothership". This is usually what botnets are- large swaths of infected devices phoning home to a control server "mothership". This is why you should monitor the traffic not only going into your network, but even more importantly, the traffic leaving it.
By this point, all of this sounds like a lot of overhead. You came here looking for information about how to remotely SSH into a host on your homelab and now I'm telling you that you need to not only create this reverse SSH tunnel, but you also now need to buy, secure, and maintain a new server outside of your homelab? Geez, opening up port 22 and just port forwarding is starting to sound pretty good right now.
No, no, you don't need to do all of that. While I believe it's good to have the knowledge and understanding, I also believe in economies of scale and comparative advantage. Let the people who specialize in such things do them. They have the specialized knowledge to secure such things. Thankfully, there is such a service- remot3.it (formerly known as weaved). remote.it maintains the mothership and by installing a simple utility, creates the reverse SSH tunnel service for you, allowing you to simply and easily connect to your RPi/Debian/Ubuntu host from anywhere.
Now, enough theory, let's begin.
How to Install remote.it connectd ("Weaved"):
This method will work on all Linux devices, especially Debian-based ones such as the Raspberry Pi or Ubuntu hosts. I will call out any differences as needed.
1. Create and register an account with Remote.it
2. Enable SSH:
If you're on a RPi, this can be done simply by enabling and starting the ssh service:
sudo systemctl enable ssh
sudo systemctl start ssh
If you're running Ubuntu/Debian Linux, you'll need to install the openssh-server:
sudo apt install openssh-server
3. Download Remote.it's connectd:
curl -LkO https://raw.githubusercontent.com/remoteit/installer/master/scripts/auto-install.sh4. Make the resulting download executable:
chmod +x ./auto-install.sh5. Execute and run the install script:
sudo ./auto-install.sh6. Configure your device with:
sudo connectd_installer
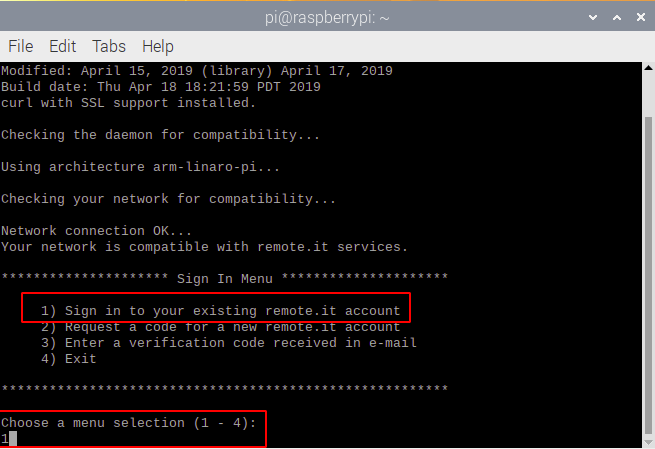
7. Follow the prompt, beginning with selecting 1 to sign in and connect the device to your newly created Remote.it account:
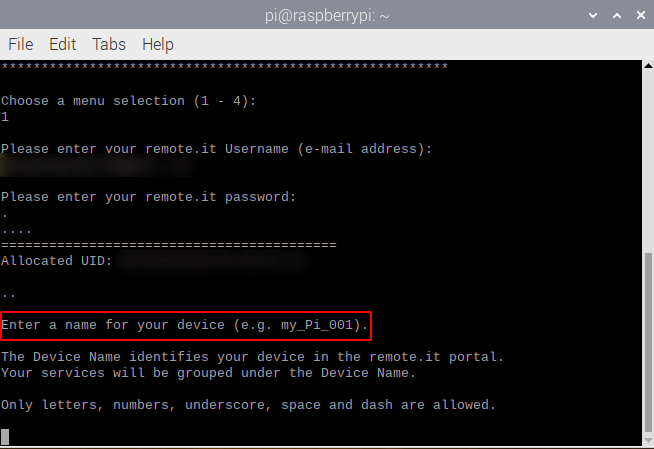
8. Enter a name for your device to be identify it on Remote.it:
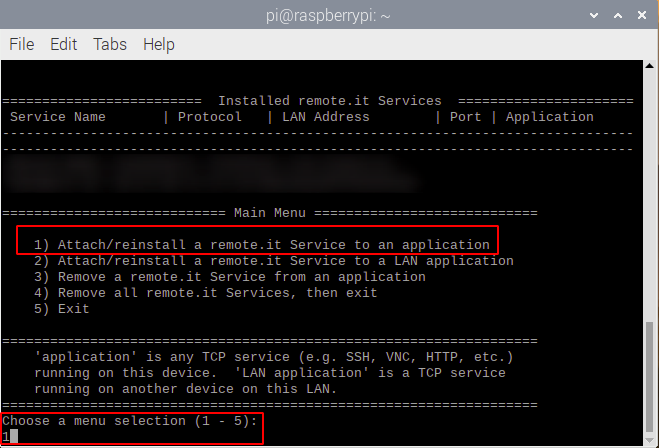
9. Once your device is registered with Remote.it, we're going to attach a Remote.it service to an application by selecting option 1:
10. Select option 1- "SSH on Port 22":
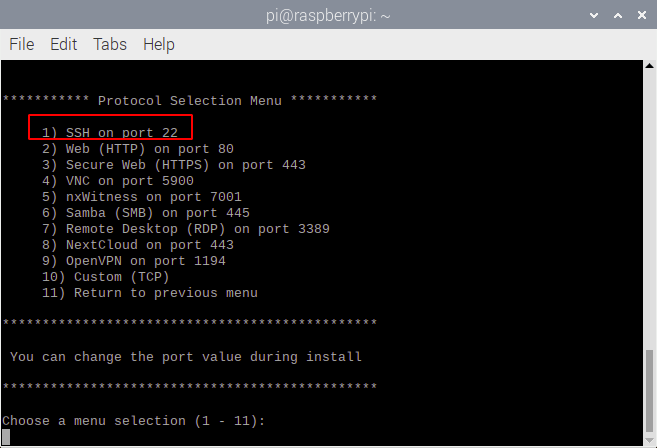
Take a look at all of the other services we can run remotely and securely thanks to Remote.it! For now though, we're going to just install the SSH service on port 22. It will prompt you again asking if you want to change the port, unless you have changed your SSH port when you set up your SSH server in step 2 above, just leave the default.
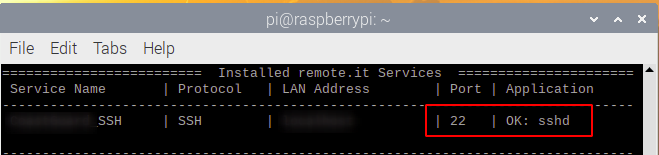
If all goes well, you should now see this:
Connecting To Your Remote Device With Your New Reverse SSH Tunnel:
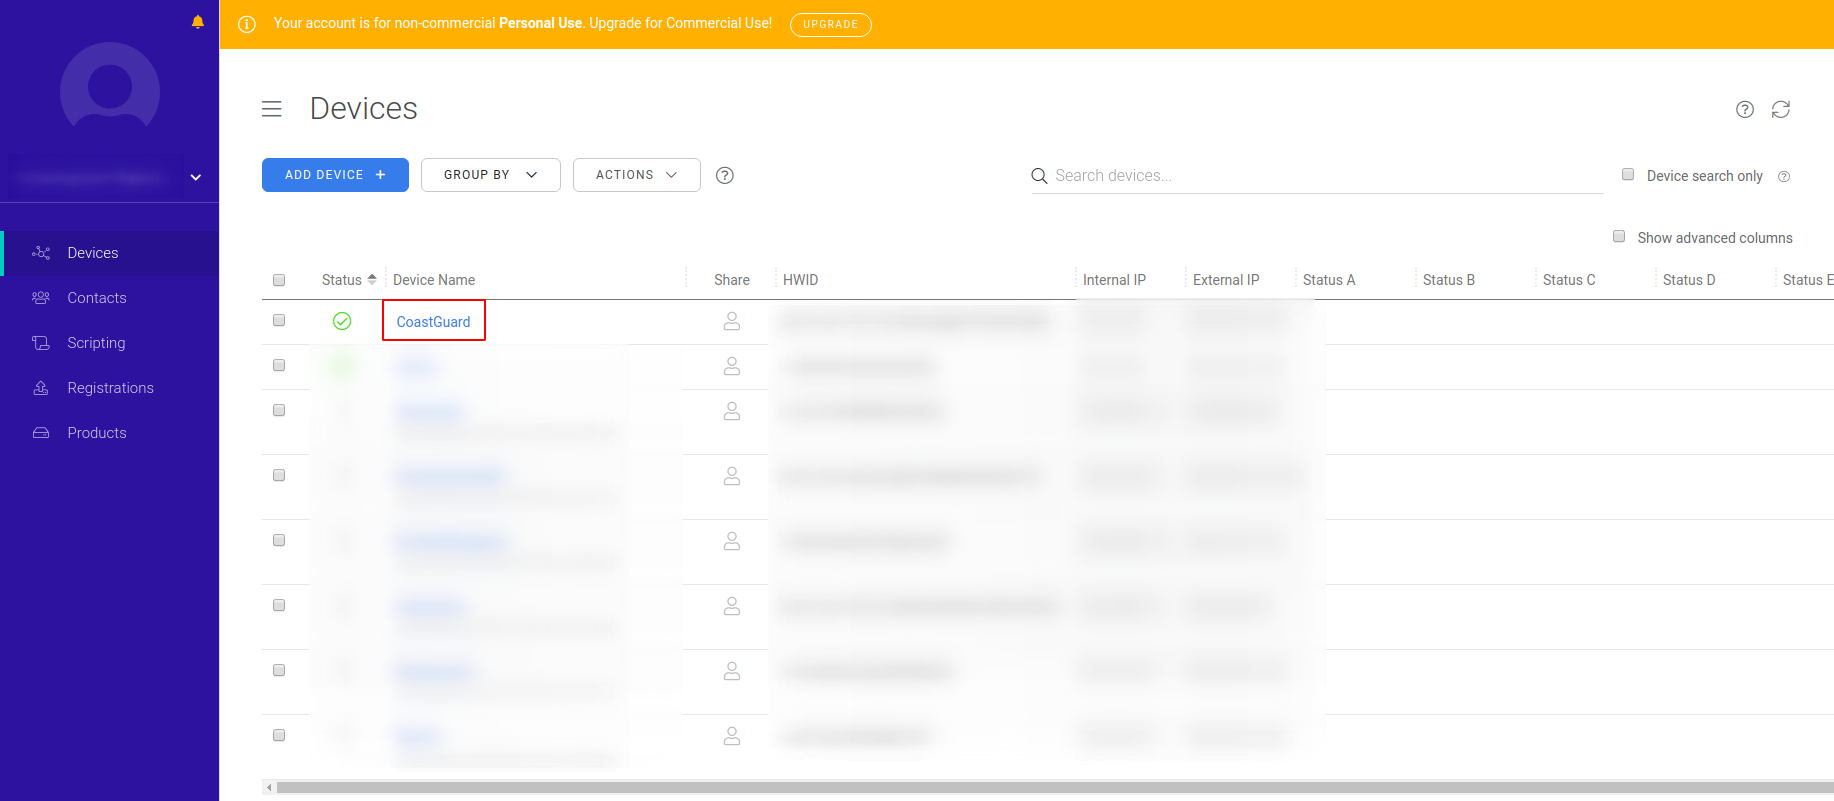
11. We've finally reached the fun part. Go to remote.it and log into your account. You should see the following screen. Click on the name of your device:
12. You'll then be presented with a list of running services on the device. Click on your newly created SSH service:
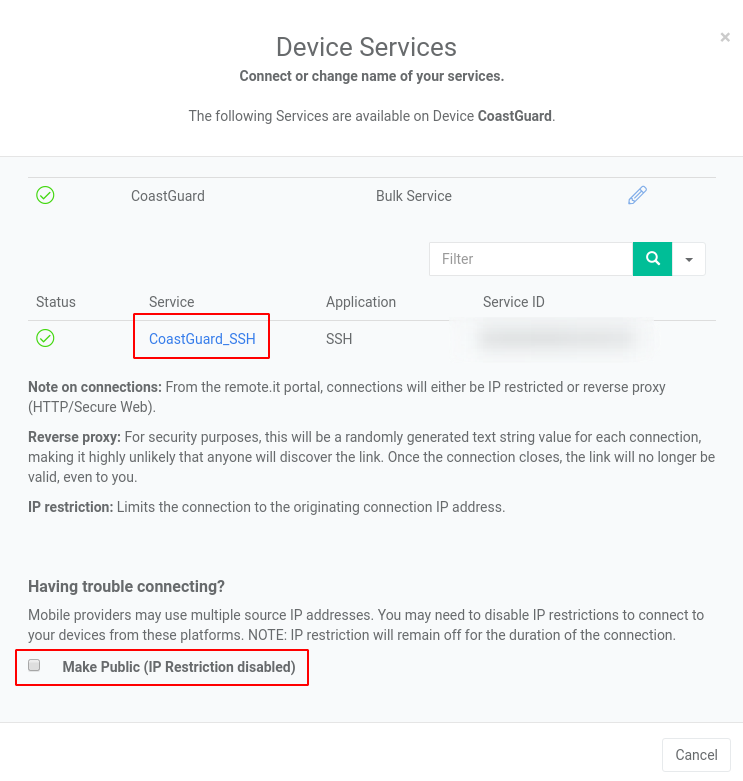
Note that you may have to check/enable the "Make Public" box. I often have to do this when I am connected to a phone hotspot on my laptop.
13. SSH into your device using the settings that Remote.it now presents to you:
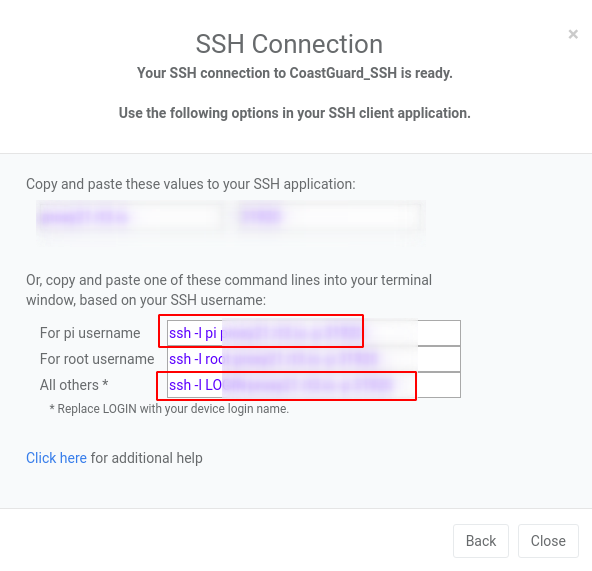
If you're using a RPi (with the default pi username), just copy and paste the line next to "For pi username" into your local laptop's terminal. If you're not using an RPi (or are using a different username), simply copy and run the line next to "All Others". (Don't forget to change the piece that says LOGIN with the remote device's username).
I don't know why I blurred out the actual settings- these connections are created temporarily. Paranoia, I guess. :-)
That's it! Now you have an emergency lifeline to remotely access your homelab network when you're away. Cheers!
As always, if you have any questions or feedback, I'd be glad to hear them in the comments below!
Interested in this topic and others like it? Join our community and join in the discussion! We currently have a need for moderators so if you can help out it would be much appreciated!