A rapid-start guide to setting up a VNC server on an RPi for remote desktop, allowing you to quickly obtain a GUI into your homelab.
By this point in the Unattended Server Checklist series, we've now covered setting up an emergency reverse SSH tunnel backup on our homelab, how to use that reverse SSH tunnel connection to wake up a shutdown server on that network with WOL, and even how to wake up servers on different VLANs by making our RPi VLAN-aware. Up to this point, all of this has been achieved through the command line.
In today's tutorial, we will use that same reverse SSH tunnel to give us a remote desktop onto the device with x11vnc. A GUI desktop can be extremely helpful to have when interacting with other devices in the homelab that are best handled through a GUI experience such as administering a pfSense firewall/router.
Why x11vnc? I prefer x11vnc mainly for the fact that it uses the existing X desktop out of the box. Many, if not most, other VNC applications will create a new X session/desktop when they start, which means their application windows won't persist across VNC sessions.
Install the x11vnc server on your RPi/Ubuntu/Debian Remote Host:
1. Install x11vnc with the following command:
sudo apt install x11vnc2. With x11vnc now installed, create a password to secure x11vnc:
x11vnc -storepasswdTake note of the password location that prints out, we'll need it for later:

3. If you've been following my other guides, you are aware that we have been using Remote.it's connectd to reverse SSH in. We are also going to use Remote.it to connect to our VNC server. Run the following command and log in with your Remote.it credentials:
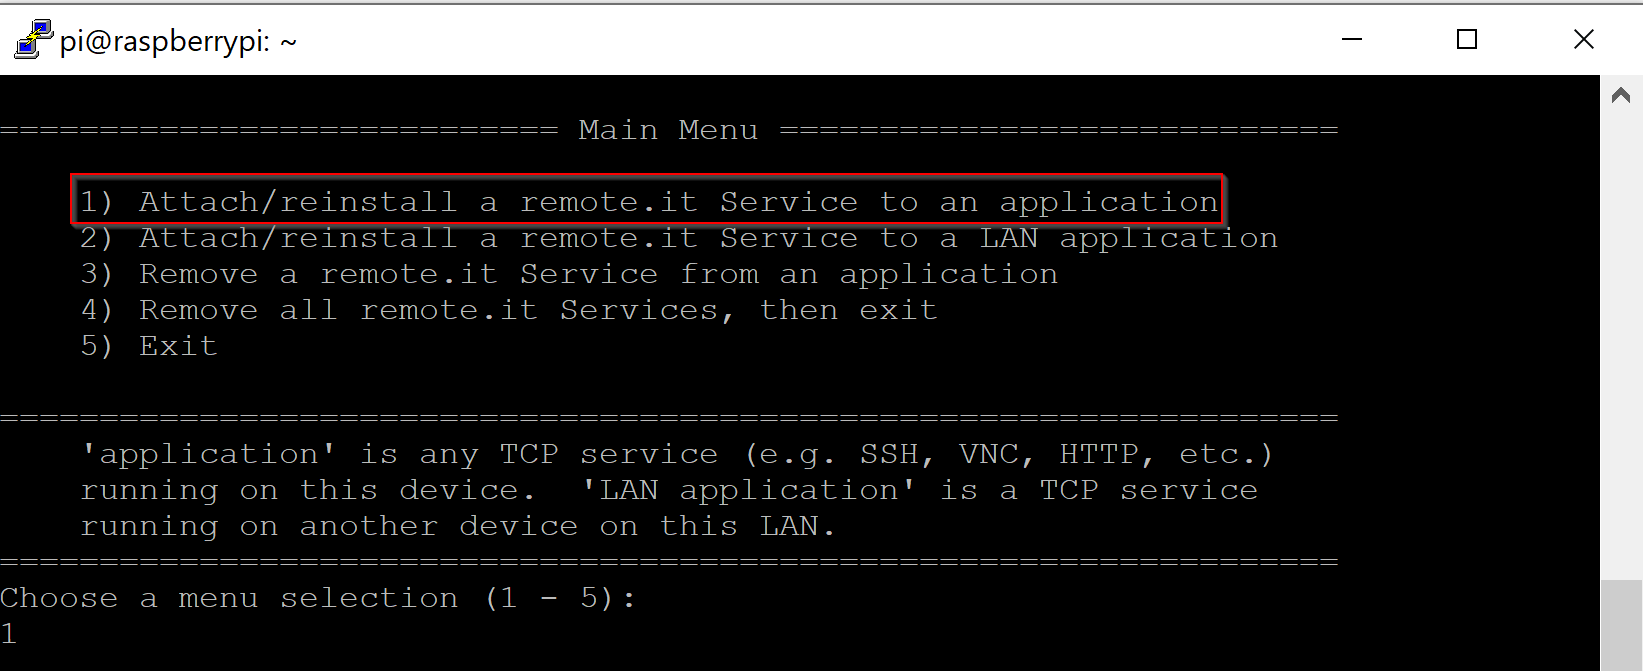
sudo connectd_installer4. Select option 1- Attach/reinstall a remote.it Service to an application:
5. Select option 4- VNC on port 5900:
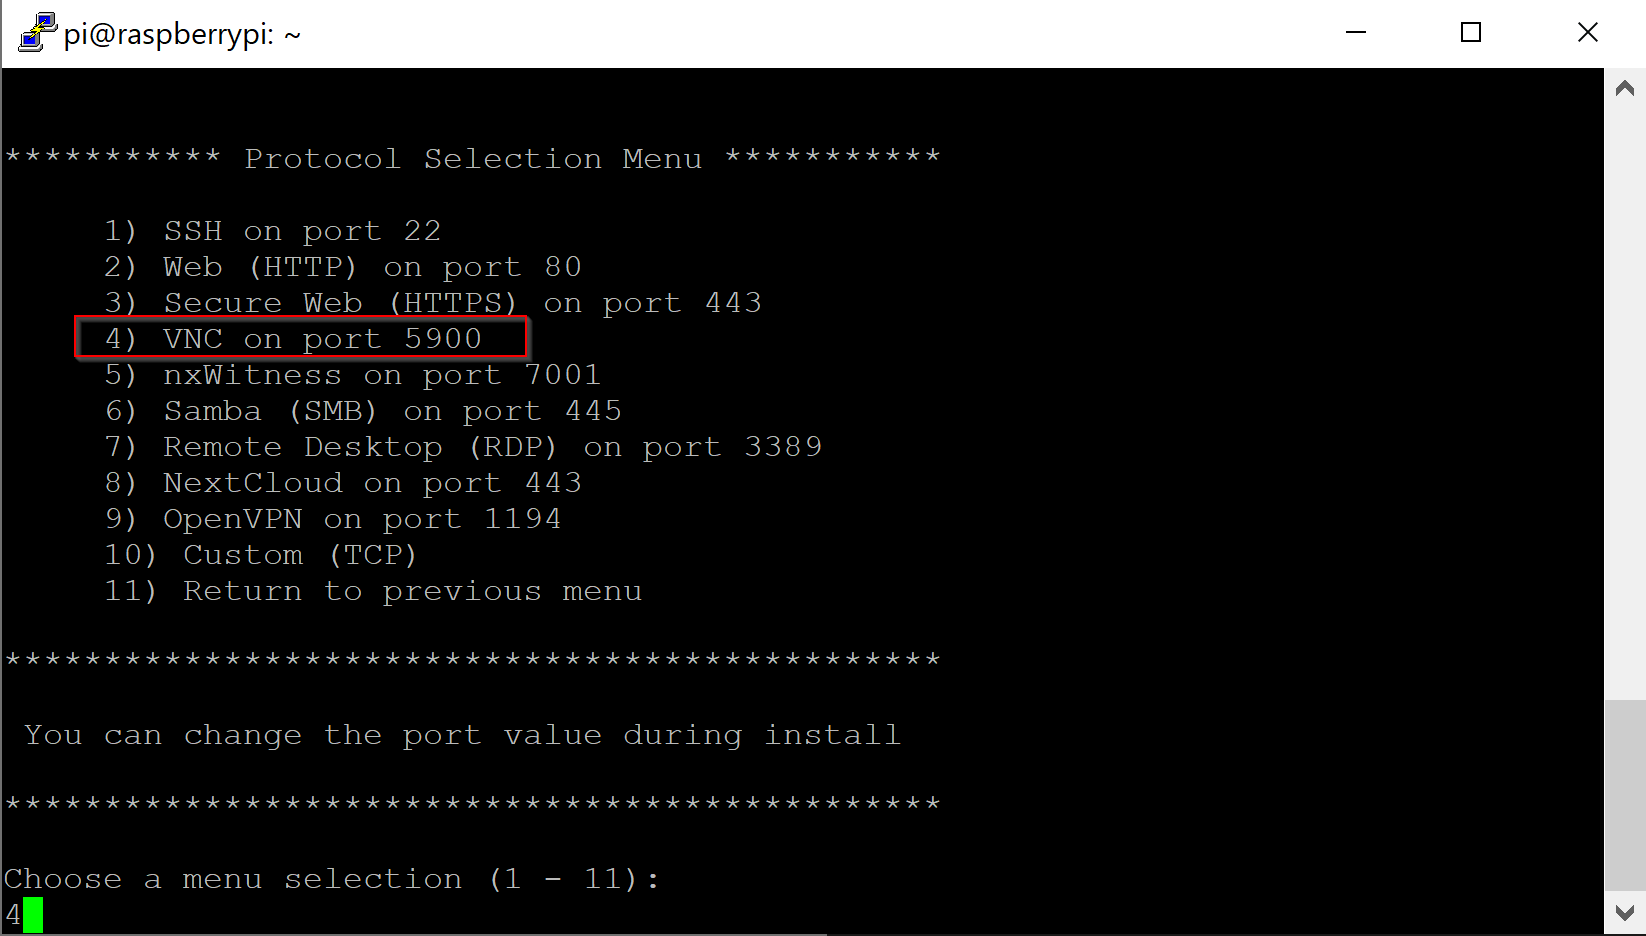
Continue with the defaults (port 5900 is fine) and give it a name.
Notice that once the service is added, Remote.it tells us that the application is not detected:

This is because our x11vnc server isn't actually running. We now need to run it.
6. Run x11vnc:
x11vnc -usepw7. Connect to VNC by logging into remote.it > selecting your RPi host > clicking on the VNC service:

remote.it will then present you with the settings to use in your VNC client. Alternatively, if you just close the settings box that appears, remote.it includes a handy Flash VNC client right in the web browser that you can use that will connect you automatically.
If you have any questions, feel free to ask in the comments below! If you have other questions, ask away in the forums and I will do my best to help.